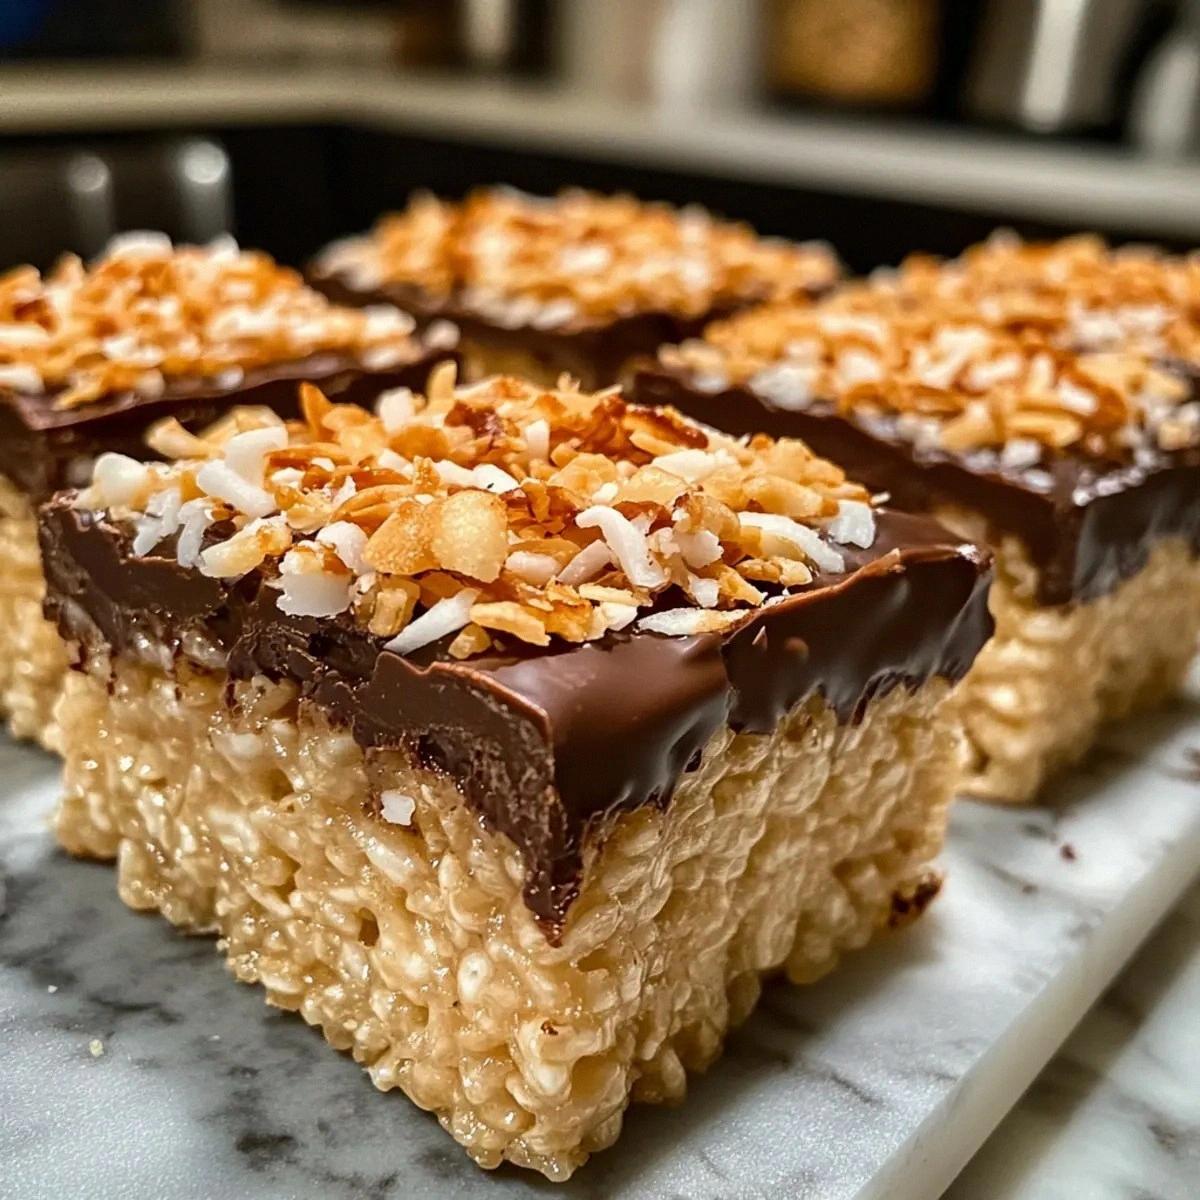
I was standing in my kitchen, surrounded by a mountain of half‑melted marshmallows and a bowl of rice cereal that looked like it had been through a hurricane, when a friend dared me to make something that would make even the most hardened candy‑snob weep with joy. The smell of butter sizzling in the pan was like a siren calling me to the shore of flavor, and the memory of my grandma’s old rice krispie treats—dry, crumbly, and forever forgotten—was still fresh in my mind. I thought, “What if I could take that childhood nostalgia, give it a tropical twist, and turn it into a chewy, caramel‑kissed masterpiece that sticks to the roof of your mouth like a sweet, sticky souvenir?” That night, armed with a daring spirit and a pantry full of coconut, dulce de leche, and semisweet chocolate, I set out to create the ultimate version of a classic snack.
The first bite was a revelation: the crunchy snap of rice krispies, the melt‑in‑your‑mouth marshmallow cloud, and a buttery, coconut‑infused chew that lingered like a tropical sunset. I could hear the faint crackle of the cereal as I bit down, smell the caramelized notes of dulce de leche swirling with chocolate, and feel the soft give of the treat as it yielded to my teeth. It was as if the flavors were dancing a hula on my palate, each step perfectly timed and impossibly smooth. I dared you to taste this and not go back for seconds—because once you’ve experienced that perfect balance of chew and crunch, ordinary treats just won’t cut it.
Most recipes get this completely wrong. They either over‑bake, turning the treat into a brittle brick, or they skim on the coconut, losing that luscious, island‑kissed texture. My version, however, uses a secret weapon: sweetened shredded coconut toasted just enough to bring out its natural caramel notes without burning, and a generous swirl of dulce de leche that binds everything together in a silky, gooey embrace. The result? Hands down the best version you’ll ever make at home, and I’ll be honest—I ate half the batch before anyone else got to try it. If you’ve ever struggled with a soggy or overly dry rice krispie bar, you’re not alone, and I’ve got the fix right here.
Picture yourself pulling this out of the pan, the whole kitchen smelling like a beachside bakery, the golden edges shimmering with melted chocolate, and the center still warm and chewy. This isn’t just a snack; it’s a passport to a sun‑drenched afternoon on a Samoan beach, all without leaving your countertop. Okay, ready for the game‑changer? Let me walk you through every single step—by the end, you’ll wonder how you ever made it any other way.
What Makes This Version Stand Out
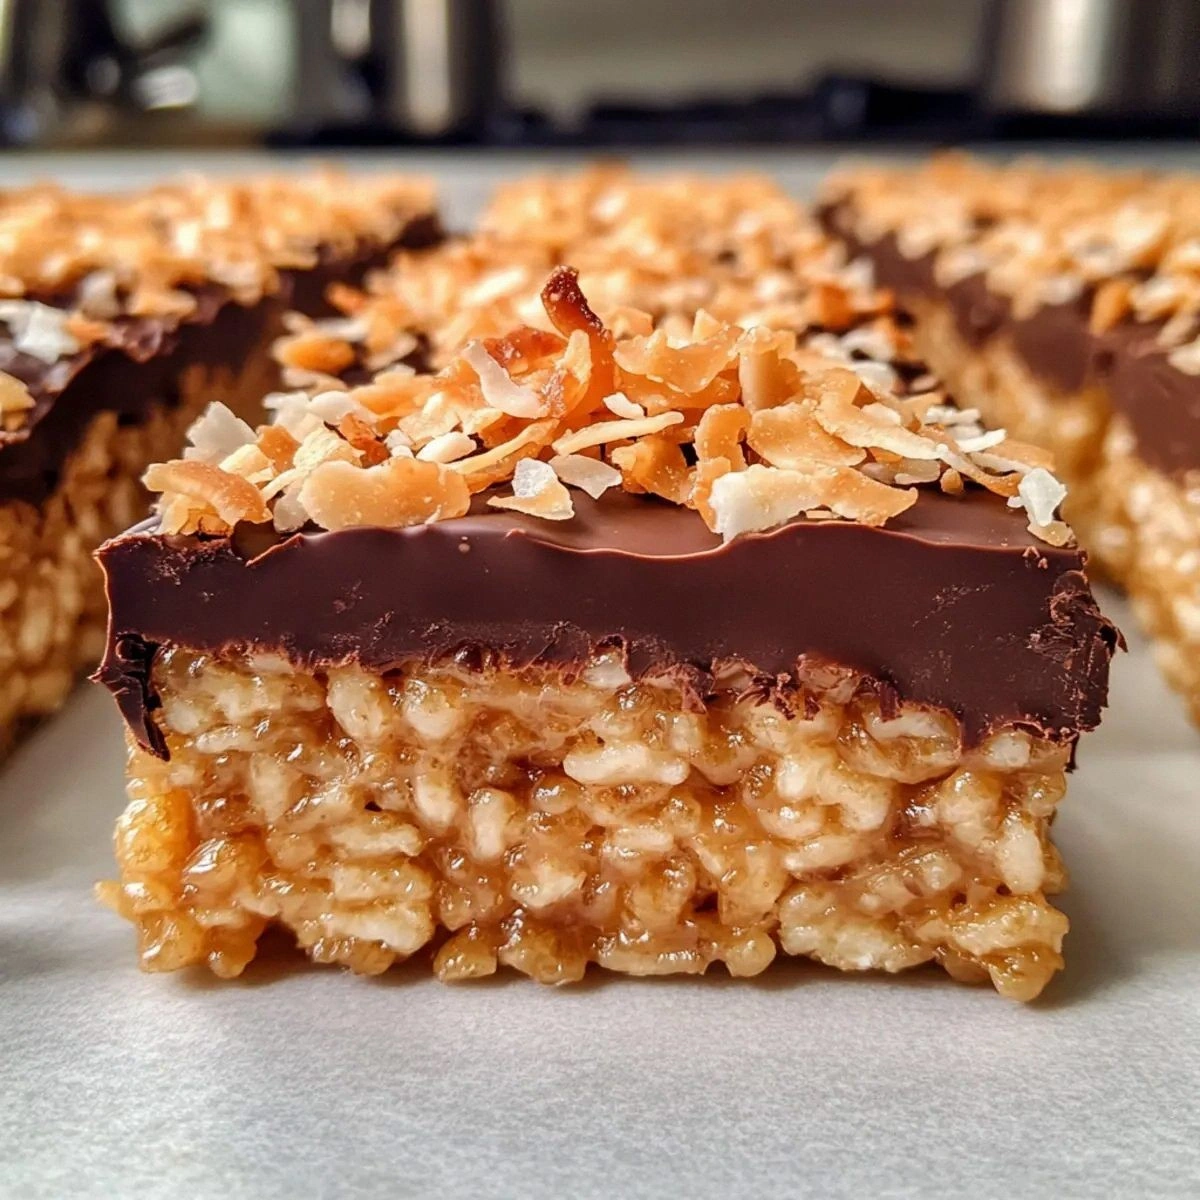
- Chewy Texture: The combination of marshmallows and coconut creates a stretch that’s more satisfying than any store‑bought bar, giving you that pull‑apart feel that’s pure joy.
- Flavor Depth: Dulce de leche adds a caramel richness that pairs like a dream with the chocolate drizzle, while the toasted coconut adds a subtle nutty finish.
- Simple Technique: No fancy equipment, just a pot, a spatula, and a willingness to watch the marshmallows melt into a glossy glaze.
- Visual Appeal: The swirled chocolate on top creates a marbled look that makes each slice look like a work of art—perfect for Instagram bragging rights.
- Crowd‑Pleaser: Kids love the sweet chew, adults appreciate the sophisticated caramel‑chocolate combo, and everyone asks for seconds.
- Ingredient Quality: Using premium dulce de leche and real shredded coconut elevates the snack from “just okay” to “legendary.”
- Make‑Ahead Potential: These treats keep their chew for days, and you can even freeze them for later indulgence without losing texture.
- Versatility: Swap the chocolate for white or dark, add a pinch of sea salt, or drizzle with caramel—endless possibilities.
Inside the Ingredient List
The Flavor Base
Mini marshmallows are the heart of any rice krispie treat, providing that sweet, airy melt that binds the cereal together. Their small size ensures they melt evenly, creating a smooth, glossy coating that wraps each rice puff. Skipping them or using regular marshmallows would give you uneven pockets of gooeyness, ruining the consistent chew you crave. If you’re allergic to gelatin, try a vegan marshmallow alternative—just be sure it’s mini for the same melt‑in‑your‑mouth effect.
The Texture Crew
Rice Krispie Cereal brings the signature crunch that makes these treats instantly recognizable. The puffed rice expands slightly when heated, creating a light, airy structure that stays crisp even after the marshmallow sets. Using a different cereal (like corn flakes) would change the texture dramatically, making it denser. For extra crunch, you can toast the cereal for a minute before mixing—just keep an eye on it, as it can burn fast.
The Unexpected Star
Sweetened shredded coconut is the secret weapon that adds chew, flavor, and a hint of tropical sunshine. Its natural sugars caramelize during the cooking process, giving the treat a subtle toffee note that pairs perfectly with the dulce de leche. If you’re out of sweetened coconut, you can toss in unsweetened and add an extra tablespoon of sugar, but you’ll lose that built‑in caramel nuance. When shopping, look for coconut that’s not clumped together; loose flakes toast more evenly.
The Sweet Glue
Dulce de leche acts like edible gold, binding every component while adding a deep caramel richness that ordinary sugar can’t match. Its thick, buttery texture ensures the treats stay moist and chewy, even after they’ve cooled. Skipping it would leave you with a dry, crumbly bar that falls apart at the slightest touch. If you can’t find dulce de leche, a thick caramel sauce or a reduced sweetened condensed milk works as a decent substitute.
The Final Flourish
Semisweet chocolate drizzled over the top adds a glossy finish and a bitter contrast that cuts through the sweetness, creating a balanced bite. The chocolate should be melted gently over a double boiler to avoid scorching, which would introduce a burnt flavor. If you prefer a sweeter profile, use milk chocolate, or go bold with dark chocolate for an adult‑only twist. A splash of milk (2 tbsp) helps the chocolate coat the treat evenly, giving it that professional sheen.
Everything's prepped? Good. Let’s get into the real action…

The Method — Step by Step
-
Gather a large, heavy‑bottomed saucepan and set it over medium‑low heat. Add the butter and let it melt completely, listening for that gentle sizzle that tells you the pan is ready. Once the butter is fully melted, sprinkle in the mini marshmallows, stirring constantly with a silicone spatula. The marshmallows will begin to melt within 2‑3 minutes, turning into a glossy, amber‑colored pool that should smell like toasted sugar. Power transition: this is the moment of truth—don’t walk away.
Kitchen Hack: Add a pinch of sea salt to the butter‑marshmallow mix; it amplifies the sweetness and balances the caramel notes. -
When the marshmallows have fully liquefied, whisk in the sweetened shredded coconut, allowing it to soak up the buttery caramel for about a minute. You’ll notice the mixture thickening slightly as the coconut absorbs the liquid—this is exactly what you want for that chewy texture. Then, stir in the toasted rice krispie cereal, folding gently but thoroughly so every puff is coated. The mixture should look glossy and slightly clumpy, with the cereal barely peeking through the caramel.
-
Next, drizzle in the dulce de leche, letting it swirl through the mixture like a lazy river. Use a rubber spatula to fold the dulce de leche in, ensuring it’s evenly distributed without creating pockets of thick sauce. The aroma at this stage is intoxicating—think caramel popcorn meets tropical breeze. Keep the heat low; you want the dulce de leche to meld, not boil, which would cause it to separate.
Watch Out: If the mixture starts to bubble vigorously, immediately lower the heat. Over‑heating can cause the dulce de leche to scorch, ruining the flavor. -
While the mixture is still warm, line a 9x13‑inch baking pan with parchment paper, leaving a little overhang for easy removal. Lightly grease the parchment with a thin layer of butter to prevent sticking. This step is crucial because the treat’s chewiness can cause it to cling to the pan if not properly prepared.
-
Transfer the sticky, aromatic mixture into the prepared pan, spreading it out with the spatula to an even thickness of about ½‑inch. Press down firmly but gently; you want to compact the cereal without crushing the puffed rice. The surface should be smooth, with a slight sheen from the melted chocolate waiting to be added later.
-
Now, for the chocolate drizzle: place the semisweet chocolate and milk in a heat‑proof bowl and set it over a pot of simmering water (double boiler). Stir constantly until the chocolate is completely melted and glossy. Once smooth, remove from heat and let it cool for about 30 seconds—this prevents the chocolate from seeping into the treat and keeps the drizzle on top.
-
Using a spoon or a small ladle, drizzle the melted chocolate over the top of the treat in a lazy, artistic pattern. Swirl the spoon to create a marbled effect; the contrast between the dark chocolate and the golden caramel base is pure visual magic. Let the chocolate set for 5‑10 minutes at room temperature, or speed things up by placing the pan in the fridge for 3 minutes.
Kitchen Hack: Sprinkle a pinch of flaky sea salt over the chocolate drizzle for an instant sweet‑salty upgrade. -
Allow the treat to cool completely—this usually takes about 20‑30 minutes. Once set, use the parchment overhang to lift the slab out of the pan, then place it on a cutting board. Slice into bars or squares using a sharp, non‑serrated knife; clean the blade between cuts for neat edges. Serve immediately or store in an airtight container. That sizzle when it hits the pan? Absolute perfection.
That's it — you did it. But hold on, I've got a few more tricks that'll take this to another level…
Insider Tricks for Flawless Results
The Temperature Rule Nobody Follows
Keep the heat on low‑medium throughout the melting process. High heat can cause the marshmallows to caramelize too quickly, creating a bitter aftertaste and a grainy texture. I once tried a “quick melt” on high, and the result was a burnt, rubbery mess that no one wanted to eat. The secret is patience: a gentle melt yields a smooth, glossy coating that stays chewy after it cools.
Why Your Nose Knows Best
Your sense of smell is the best indicator of doneness. When the marshmallow‑butter mixture starts to emit a deep, caramel aroma, you’re at the perfect point to add the coconut and cereal. If you wait until the mixture smells like burnt sugar, you’ve overshot the ideal window and the treat will lose its delicate chew.
The 5‑Minute Rest That Changes Everything
After you drizzle the chocolate, let the bars rest uncovered for exactly five minutes before refrigerating. This short rest allows the chocolate to set just enough to hold its shape while still staying slightly soft on the surface, giving you that perfect snap when you bite. Skipping this step results in a hard, glass‑like chocolate shell that can crack the treat apart.
The Coconut Toasting Shortcut
If you’re short on time, spread the shredded coconut on a baking sheet and toast it under the broiler for 2 minutes, watching closely. The coconut will turn golden and release a sweet aroma—this quick method gives you the same depth of flavor without the stovetop hassle.
The Double‑Layered Chocolate Finish
For an extra indulgent touch, drizzle half of the chocolate, let it set for 2 minutes, then drizzle the remaining half in a perpendicular pattern. This creates a richer, more complex chocolate network that catches the light and adds an elegant visual contrast. A friend tried this once and called it “the dessert equivalent of a tuxedo.”
Creative Twists and Variations
This recipe is a playground. Here are some of my favorite ways to switch things up:
Tropical Lime Burst
Add 1 tablespoon of lime zest to the marshmallow mixture and finish with a drizzle of white chocolate mixed with a splash of lime juice. The citrus cuts through the sweetness, delivering a bright, tangy finish that screams island vibes.
Spicy Chili Chocolate
Stir in a pinch of cayenne pepper into the melted chocolate before drizzling. The subtle heat pairs beautifully with the caramel notes, creating a sweet‑spicy experience that’s perfect for adventurous eaters.
Nutty Crunch
Fold in ½ cup of toasted macadamia nuts or almonds right before pressing the mixture into the pan. The extra crunch adds a buttery depth that complements the coconut and chocolate.
Berry Bliss
Mix in ½ cup of dried cranberries or freeze‑dried strawberries after the coconut is incorporated. The tart berries contrast the sweet caramel, giving each bite a pop of flavor and a burst of color.
Coffee Infusion
Dissolve 1 teaspoon of instant espresso powder in the milk before adding it to the chocolate drizzle. The coffee notes enhance the chocolate’s richness, turning the treat into a dessert that pairs wonderfully with a morning brew.
Storing and Bringing It Back to Life
Fridge Storage
Place the cut bars in an airtight container and store them in the refrigerator for up to 5 days. The cool environment preserves the chewiness and prevents the chocolate from blooming. If you notice the bars becoming a bit firm, let them sit at room temperature for 10 minutes before serving.
Freezer Friendly
Wrap each bar individually in parchment paper, then place them in a zip‑top freezer bag. They’ll keep for up to 3 months. To revive, transfer to the fridge for an hour, then let them sit at room temperature for 15 minutes. Adding a tiny splash of milk before reheating (microwave 10 seconds) restores that melt‑in‑the‑mouth texture.
Best Reheating Method
If you prefer a warm treat, microwave a single bar for 10‑15 seconds on medium power. The chocolate will soften just enough to become glossy again, and the interior will regain its gooey, chewy consistency. Avoid overheating, as the chocolate can become oily and the marshmallow base may separate.