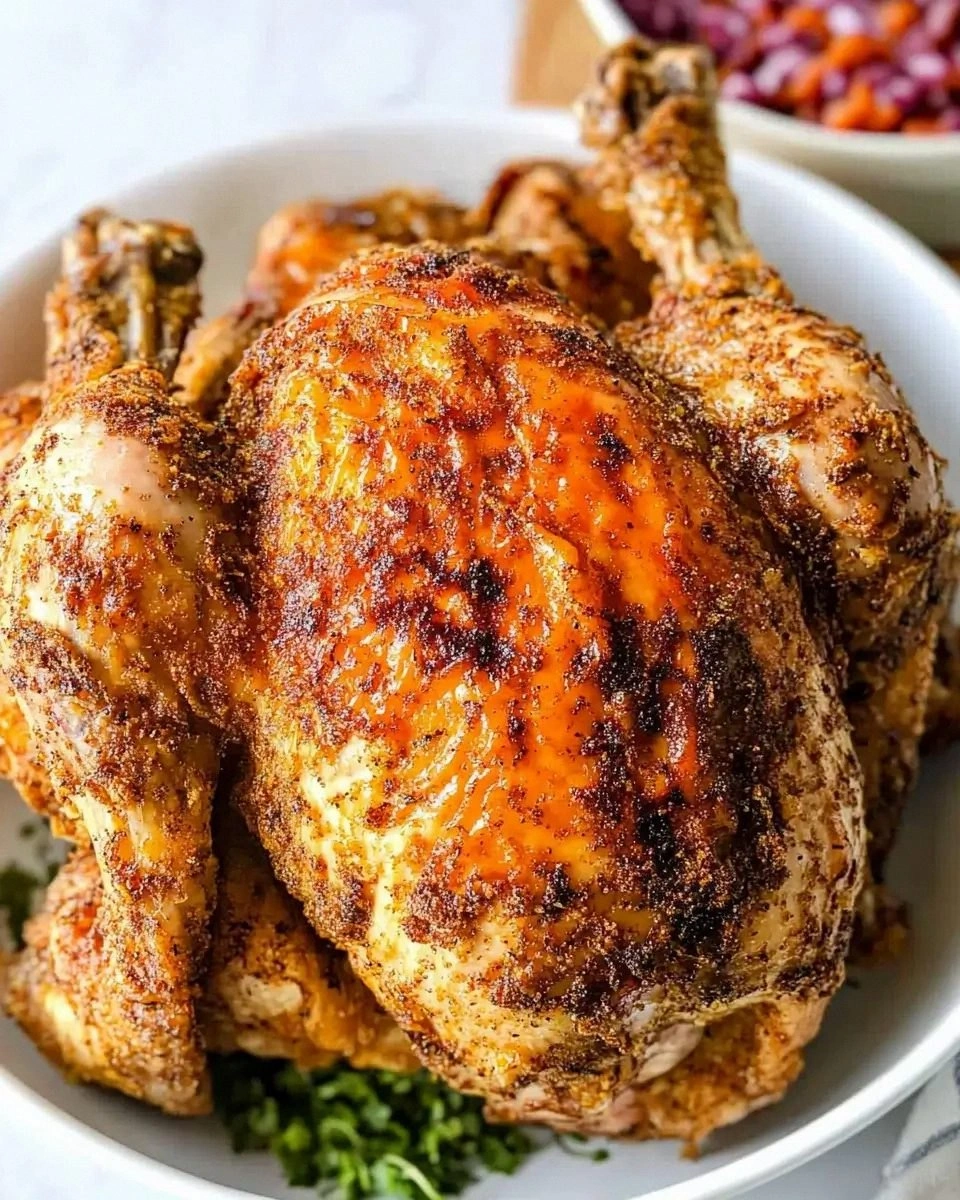
I’ll be honest — I was staring at a burnt, rubber‑y chicken that had survived a week‑long “slow‑roast” experiment and thought, “There has to be a better way.” The kitchen was a battlefield of smoke, disappointment, and a lingering smell that could have scared a skunk. Then a friend dared me to try the new air‑fryer that just hit the countertop, promising “crispy skin without the oil.” I accepted the challenge, and what happened next was nothing short of culinary alchemy. The moment that golden, crackling skin hit the air‑fryer basket, the kitchen filled with a scent so intoxicating it felt like a summer fair mixed with a backyard grill, and I knew I was onto something legendary.
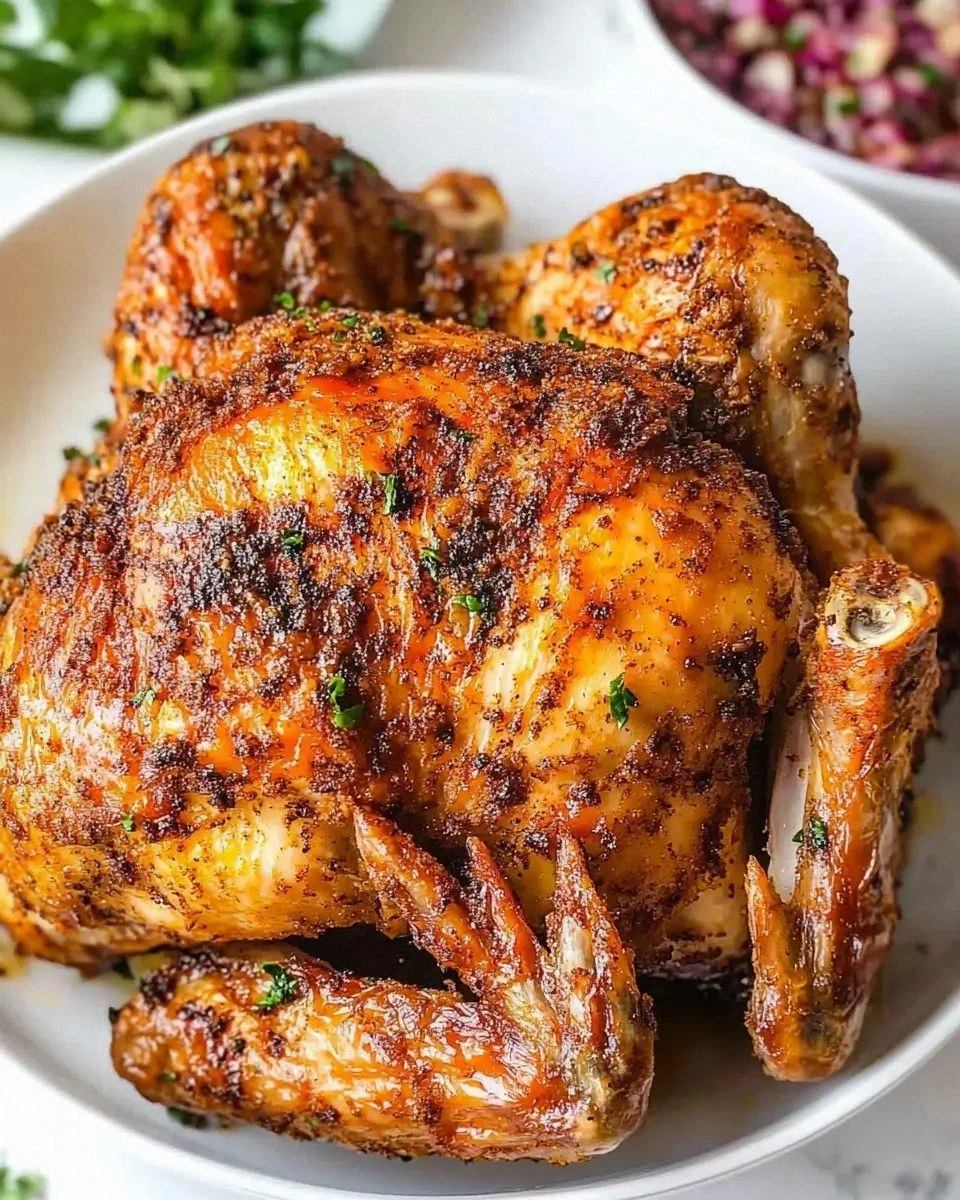
Picture this: a whole chicken, its skin glistening like polished amber, the meat inside so tender it practically falls off the bone with the slightest nudge of a fork. You can hear the faint sizzle as the hot air whirls around, a sound that’s practically a drumroll for your taste buds. The aroma is a symphony of rosemary, garlic, and a whisper of smoked paprika that makes you want to inhale deeply and never let go. When you finally pull it out, the skin shatters under the pressure of your fingertips like thin ice, revealing juicy, succulent flesh that’s still warm from the inside. That first bite? It’s an explosion of flavor that makes you question every other chicken recipe you’ve ever tried.
Most recipes get this completely wrong. They either drown the bird in oil, leave it soggy, or require a marathon of prep that feels more like a science project than dinner. This version, however, flips the script with a handful of pantry staples, a single 30‑minute air‑fryer session, and a secret technique that I’m about to spill: a dry‑brine that works like a flavor‑locking hug for the meat. No need for a deep‑fat fryer, no endless flipping, just pure, unadulterated crunch and juiciness that will make your friends beg for the recipe.
I dare you to taste this and not go back for seconds. The combination of a perfectly seasoned dry‑brine, a quick coat of oil, and the relentless hot‑air circulation of the air fryer creates a skin that’s crispier than a fresh‑fried chicken wing and meat that’s as tender as a slow‑cooked stew. Ready for the game‑changer? Let me walk you through every single step — by the end, you’ll wonder how you ever made it any other way.
What Makes This Version Stand Out
- Flavor Punch: The dry‑brine infuses every fiber of the chicken with salt, herbs, and a hint of citrus, ensuring every bite bursts with depth.
- Texture Triumph: The air fryer’s rapid hot‑air circulation creates a skin that cracks like a fresh potato chip while keeping the meat moist.
- Simplicity: Only a handful of ingredients and a 30‑minute cook time make this a weeknight hero without any fancy equipment.
- Unique Twist: The secret dry‑brine overnight gives you the flavor of a slow‑roasted bird in a fraction of the time.
- Crowd Reaction: Guests will swear they’ve never tasted chicken this good, prompting endless requests for seconds and thirds.
- Ingredient Quality: Using a fresh, organic whole chicken lets the natural juices shine through, making the seasoning the perfect partner.
- Cooking Method: The air fryer eliminates the need for deep‑frying, cutting down on mess, calories, and kitchen smoke.
- Make‑Ahead Potential: The dry‑brine can be prepared up to 24 hours in advance, turning a busy day into a quick, stress‑free dinner.
Inside the Ingredient List
The Flavor Base
The star of the show is the whole chicken itself. A good chicken should have firm, pink flesh and a skin that feels supple to the touch. If the skin looks dull or the meat feels mushy, you’ve probably got a low‑quality bird that won’t hold up to the high heat of the air fryer. When you shop, look for a chicken that’s about 3.5 to 4 pounds — big enough to feed a family but not so massive that the center stays cold. If you can, ask the butcher to remove any excess fat and to trim the neck and giblets for a cleaner presentation.
The Texture Crew
A drizzle of high‑smoke‑point oil (like avocado or grapeseed) is essential. It coats the skin, creating a conductive layer that helps the hot air crisp the exterior without burning. Skip the butter; it burns too quickly and will leave a bitter aftertaste. If you’re watching calories, a light brush is all you need — the air fryer’s own circulation does the heavy lifting.
The Unexpected Star
Kosher salt is the unsung hero of the dry‑brine. Its larger crystals dissolve slowly, drawing out moisture at just the right rate and then re‑absorbing it with the added flavors. This process not only seasons the meat deeply but also helps the skin dry out, which is the secret to that crackling finish. If you’re out of kosher salt, sea salt works, but avoid fine table salt — it can make the skin soggy.
The Final Flourish
Fresh herbs like rosemary, thyme, and sage add aromatic depth that pairs perfectly with the chicken’s natural flavor. When you crush the herbs between your fingers, you release essential oils that turn a simple roast into a fragrant masterpiece. If you’re out of fresh herbs, dried versions work, but use only half the amount — dried herbs are more concentrated. A final squeeze of lemon juice right before serving adds a bright, acidic pop that cuts through the richness and lifts the entire dish.
Everything's prepped? Good. Let's get into the real action…
The Method — Step by Step
First, pat the chicken dry with paper towels. This may seem trivial, but every droplet of moisture left on the skin is a potential roadblock to crispness. I dare you to skip this step and see how the skin ends up soggy and sad. After drying, sprinkle a generous pinch of kosher salt all over the bird, making sure to get it under the wings and into the cavity. The salt starts its magic immediately, drawing out excess moisture.
Now comes the dry‑brine. Mix 2 teaspoons of kosher salt, 1 tablespoon of brown sugar, a teaspoon of cracked black pepper, and a teaspoon of smoked paprika in a small bowl. Rub this mixture all over the chicken, again being thorough under the skin where possible. Place the bird on a rack set over a rimmed baking sheet and let it rest uncovered in the fridge for at least 2 hours, preferably overnight. This step is pure gold; the skin dries out just enough to become a canvas for crispness.
Kitchen Hack: If you’re short on fridge space, set the brining bird on a cooling rack inside a large zip‑top bag and place the bag in the fridge; the bag keeps any drips contained.While the chicken brines, prepare your flavor oil. In a small bowl, whisk together 2 tablespoons of avocado oil, 1 minced garlic clove, a teaspoon of chopped rosemary, and a teaspoon of thyme leaves. This mixture will add a fragrant coating that adheres to the skin during cooking. If you love a little heat, add a pinch of cayenne pepper; it’ll give the final crust a subtle kick.
After the brining period, remove the chicken and give it a quick second pat with paper towels. This removes any surface moisture that escaped during the brine. Then, brush the oil mixture all over the bird, making sure every nook and cranny is lightly coated. The oil will help the skin achieve that golden‑brown sheen we all crave.
Pre‑heat your air fryer to 360°F (182°C) for about 5 minutes. This ensures the cooking environment is hot enough from the start, which is crucial for that initial crackle. Place the chicken breast‑side down in the basket, tucking the wings close to the body to avoid obstruction. Close the lid and set the timer for 25 minutes.
Watch Out: Do not overcrowd the basket; a single whole chicken needs space to let the hot air circulate fully.Halfway through the cook (around the 12‑minute mark), flip the chicken so the breast side faces up. This ensures both sides get equal exposure to the hot air, preventing a soggy underside. At this point you’ll notice the skin starting to turn a deep amber, and the kitchen will fill with that intoxicating aroma of rosemary and smoked paprika.
When the timer dings, use a meat thermometer to check the thickest part of the thigh; it should read 165°F (74°C). If it’s a few degrees shy, give it another 3‑5 minutes. The skin should be crisp enough to snap under a gentle press, and the meat should feel springy, not rubbery.
Remove the chicken and let it rest for 10 minutes on a cutting board. Resting allows the juices to redistribute, turning every bite into a juicy, flavorful experience. While it rests, the skin will firm up even more, giving you that final crunchy texture. Slice, serve, and watch your guests’ eyes widen in anticipation.
Kitchen Hack: Tent the chicken loosely with foil while it rests; this keeps it warm without steaming away the crisp skin.
That's it — you did it. But hold on, I've got a few more tricks that'll take this to another level…
Insider Tricks for Flawless Results
The Temperature Rule Nobody Follows
Most home cooks start at a high temperature, thinking “the hotter, the better.” In reality, beginning at 360°F lets the meat cook evenly while still giving the skin time to dry out. If you crank it up to 400°F right away, the skin may char before the interior reaches safe temperature, leaving a burnt crust and raw center. Trust the lower‑start method, then finish with a quick 5‑minute blast at 400°F if you crave an extra‑crunchy finish.
Why Your Nose Knows Best
Your sense of smell is a reliable indicator of doneness. Around the 20‑minute mark, you’ll notice a sweet, herb‑laden aroma wafting from the basket. If the scent is still faint or overly “raw,” give it a few more minutes. The moment the perfume turns to a deep, caramelized perfume, you’re on the brink of perfection.
The 5‑Minute Rest That Changes Everything
Skipping the rest is a rookie mistake. Resting for exactly 5‑10 minutes lets the muscle fibers relax and re‑absorb the juices that were driven to the center during cooking. The result? A bird that’s juicy from the inside out, with no dry patches. I once served a chicken straight out of the fryer and the guests complained it was “a bit dry” — a single rest solved that problem instantly.
Air‑Fryer Basket Placement
Never place the chicken directly on the bottom of the basket; always use the rack that came with the appliance. The rack lifts the bird, allowing hot air to circulate underneath, which is essential for an even crisp. If your model lacks a rack, improvise with a small oven‑safe wire rack that fits snugly.
Seasoning Layers for Depth
Layering seasonings—first the dry‑brine, then the oil‑herb mixture—creates a flavor pyramid. Each layer builds on the previous one, resulting in a complex profile that’s both salty, aromatic, and slightly sweet. If you want even more depth, add a final dusting of smoked sea salt just before serving.
Creative Twists and Variations
This recipe is a playground. Here are some of my favorite ways to switch things up:
Lemon‑Garlic Zest
Add zest of one lemon and two extra garlic cloves to the oil mixture. The citrus brightens the flavor, making it perfect for spring picnics. Pair with a simple arugula salad for a balanced meal.
Spicy Korean Gochujang
Swap the smoked paprika for 1 tablespoon of gochujang paste mixed with a teaspoon of honey. The result is a sweet‑heat glaze that caramelizes beautifully in the air fryer. Serve with kimchi and steamed rice for an Asian‑inspired feast.
Herb‑Infused Butter Baste
Melt 3 tablespoons of butter, stir in chopped sage and thyme, and baste the chicken halfway through cooking. The butter adds richness while the herbs deepen the aromatic profile. This version is a hit for holiday gatherings.
Coffee‑Rubbed Dark Roast
Mix 1 tablespoon of finely ground coffee, 1 teaspoon of brown sugar, and a pinch of cumin into the dry‑brine. The coffee adds a subtle bitterness that balances the chicken’s natural sweetness, creating a sophisticated flavor perfect for dinner parties.
Mediterranean Olive & Feta
After cooking, toss the sliced chicken with chopped Kalamata olives, crumbled feta, and a drizzle of extra‑virgin olive oil. The salty olives and creamy feta bring a Mediterranean vibe that pairs wonderfully with a side of couscous.
Storing and Bringing It Back to Life
Fridge Storage
Cool the chicken to room temperature within two hours, then wrap tightly in foil or place in an airtight container. It will keep for up to 4 days. When you’re ready to eat, reheat in the air fryer at 350°F for 5‑7 minutes; the skin will regain its crunch.
Freezer Friendly
Slice the cooled chicken into serving portions, place each portion on a parchment sheet, and flash‑freeze for 30 minutes. Transfer the frozen pieces into a zip‑top freezer bag, label, and store for up to 3 months. To reheat, pop a piece straight into the preheated air fryer at 375°F for 8‑10 minutes.
Best Reheating Method
Add a tiny splash of water (about a tablespoon) to the basket before reheating. The water creates a gentle steam that prevents the meat from drying out while the hot air restores the crackle. This trick works wonders for leftovers that feel just as fresh as the original.