Picture this: the kitchen is a battlefield, flour dusting the countertop like snow, the oven timer ticking, and the scent of pumpkin swirling through the air like a spell. I was halfway through a batch of ordinary cookies when my friend dared me to create something that would make the entire house sigh in delight. I grabbed the pumpkin puree, the chocolate chips, the mini marshmallows, and whispered a promise that these humble ingredients would become the star of a new fall classic. The moment the dough hit the counter, the kitchen seemed to hold its breath, waiting for the magic to unfold. I swear I could hear the dough sigh, a sound that promised the sweet, gooey future that was about to be born. This is not just another cookie recipe—it's a bold, daring adventure that turns ordinary pantry staples into an irresistible pumpkin s’mores experience.
The first time I tried this recipe, the kitchen was a whirlwind of butter melting, sugar caramelizing, and pumpkin puree humming like a quiet lullaby. The air was thick with the scent of vanilla and pumpkin spice, a scent that made my mouth water before I even tasted the first bite. I remember the dough’s texture, buttery and slightly sticky, like a warm hug from a friend who knows exactly how to make comfort feel delicious. When I baked it, the cookies expanded, forming a golden crust that crackled like a campfire under a crisp autumn sky. The inside melted into a molten chocolate and marshmallow center that oozed out with every bite, leaving a trail of sweetness that lingered on my tongue. I couldn’t resist the urge to taste again, and I dare you to do the same—taste this and not go back for seconds.
What makes this version stand out is that it doesn’t just replicate a classic; it reimagines it with layers of flavor and texture that dance together like a well-rehearsed duet. I’ve added a splash of food coloring to give the dough a vibrant orange hue that looks as cozy as a pumpkin patch, but that’s only the tip of the iceberg. The combination of chocolate chips, mini marshmallows, and crushed graham crackers creates a symphony of crunch, melt, and sweetness that will have your guests asking for the recipe by the end of the night. The pumpkin puree brings depth and a subtle earthy sweetness that balances the sugary sweetness of the chocolate and marshmallows. And the final touch—an extra sprinkle of pumpkin pie spice—adds a fragrant warmth that feels like a hug from the inside. This is hands down the best version you'll ever make at home, and I promise you’ll wonder how you ever made it any other way.
The secret to this cookie’s success lies in a simple but powerful technique: folding the ingredients together in a way that preserves the moisture and ensures even distribution of the chocolate and marshmallows. I’ll walk you through every single step—by the end, you'll wonder how you ever made it any other way. From the first swirl of butter and sugars to the final fold of pumpkin puree, each action is designed to create a cookie that is soft, chewy, and packed with pockets of gooeyness. The method is straightforward, yet the results are extraordinary, giving you a cookie that feels like a campfire treat in a bite-sized form. So let’s dive in and discover why this recipe has become a staple in my fall kitchen, and how you can replicate its magic in your own home.
What Makes This Version Stand Out
- Flavor: The pumpkin puree brings a natural sweetness and depth that pairs beautifully with the chocolate and marshmallows, creating a flavor profile that feels both comforting and indulgent.
- Texture: The combination of a buttery crust, chewy interior, and molten center delivers a multi-sensory experience that is hard to beat.
- Visual Appeal: The vibrant orange hue from the food coloring makes each cookie pop, turning a simple treat into a showstopper.
- Ingredient Quality: Using high‑grade chocolate chips and fresh pumpkin puree elevates the taste, ensuring every bite is as rich as it is nostalgic.
- Make‑Ahead Potential: These cookies bake up in a single batch and can be stored for days, making them perfect for holiday parties or spontaneous cravings.
- Crowd Reaction: Friends and family consistently remark that they’ve never tasted a pumpkin cookie that feels like a campfire, and they’re eager for the next batch.
Alright, let's break down exactly what goes into this masterpiece…
Inside the Ingredient List
The Flavor Base
The butter and sugars form the backbone of this cookie, creating a buttery, slightly caramelized base that melts in your mouth. Butter is the secret to that rich, golden crust—without it, the cookies would feel flat and lifeless. Brown sugar adds a hint of molasses, deepening the flavor profile, while granulated sugar keeps the dough from becoming too dense. If you skip the brown sugar, you’ll lose that subtle depth, and the cookie will taste like a plain sugar cookie. For a dairy‑free version, try using a high‑quality coconut or oat butter; the flavor will shift slightly but remain delicious. The ratio of butter to sugar is crucial; too much butter can make the dough greasy, while too little will produce a crumbly cookie.
The Texture Crew
Pumpkin puree is the heart of the texture, adding moisture and a slight earthiness that balances the sweetness. Vanilla extract amplifies the pumpkin’s flavor and brings a warm, fragrant note that lingers on the palate. Baking soda is the leavening agent that gives the cookie a slight lift, preventing it from becoming too flat. Pumpkin pie spice is the aromatic hero that ties everything together, providing a subtle warmth reminiscent of a cozy kitchen. Salt, though small in quantity, is essential for balancing the sweetness and enhancing the overall flavor. If you’re looking for a lighter texture, consider reducing the butter slightly, but be prepared for a firmer cookie.
The Unexpected Star
The chocolate chips are the classic chocolate component that melts beautifully when baked. They create pockets of rich, glossy chocolate that contrast with the soft dough. Mini marshmallows add a playful, gooey texture that oozes out of the cookie, reminiscent of a campfire treat. Graham crackers, crushed into crumbs, provide a subtle crunch and a hint of buttery sweetness that complements the other flavors. The combination of these three elements results in a cookie that is as complex as it is comforting. If you prefer a darker chocolate, try using semi‑sweet or bittersweet chips for a more sophisticated taste.
The Final Flourish
Food coloring is a small but mighty addition that brings the cookie’s color to life, making it visually appealing for holiday gatherings. The orange hue evokes the fall season and adds a playful touch. A drop of food coloring is enough; too much will alter the flavor and texture. The second batch of chocolate chips, marshmallows, and crushed graham crackers is layered on top of the dough before baking, creating a dramatic finish. This layering technique ensures that each bite contains a burst of chocolate, a splash of marshmallow, and a crunch of graham crackers. If you’re short on time, you can mix the toppings into the dough, but the layered approach delivers the best texture contrast.
Everything's prepped? Good. Let's get into the real action…
The Method — Step by Step
- Begin by preheating your oven to 350°F (175°C) and lining a baking sheet with parchment paper. In a large mixing bowl, cream together the butter, brown sugar, and granulated sugar until the mixture is light and fluffy—about 2-3 minutes of vigorous whisking. The butter should be at room temperature so it blends smoothly; if it’s too cold, it won’t incorporate properly. Keep an eye on the color; it should start to look pale and airy. This step is crucial because the creaming process traps air, giving the cookie a tender bite. Once done, set the bowl aside and let the butter mixture chill for a minute.
- In a separate bowl, whisk together the pumpkin puree, vanilla extract, baking soda, pumpkin pie spice, and salt until the mixture is smooth. The pumpkin puree should be free of lumps; if it’s thick, add a splash of milk or water to thin it slightly. Mixing these dry and wet ingredients together before adding them to the butter mixture ensures even distribution of spices. As you stir, you’ll notice the mixture turning a gentle amber hue—this is a sign that the pumpkin is infusing its flavor. Pour this mixture into the butter base and fold gently with a wooden spoon. The goal is to keep the dough tender; avoid overmixing, which can make the cookie tough.
- Add the all-purpose flour to the dough, folding it in slowly until the batter is just combined. A few streaks of flour are acceptable; the dough should still be slightly sticky but manageable. The flour’s role is to give structure, but too much can dry out the cookie. At this point, you’ll want to taste a small spoonful—if it’s too sweet, add a pinch more salt or a splash of vanilla. This is the moment of truth, where the dough’s texture is decided. The dough should feel like a thick, buttery batter that holds its shape when scooped.
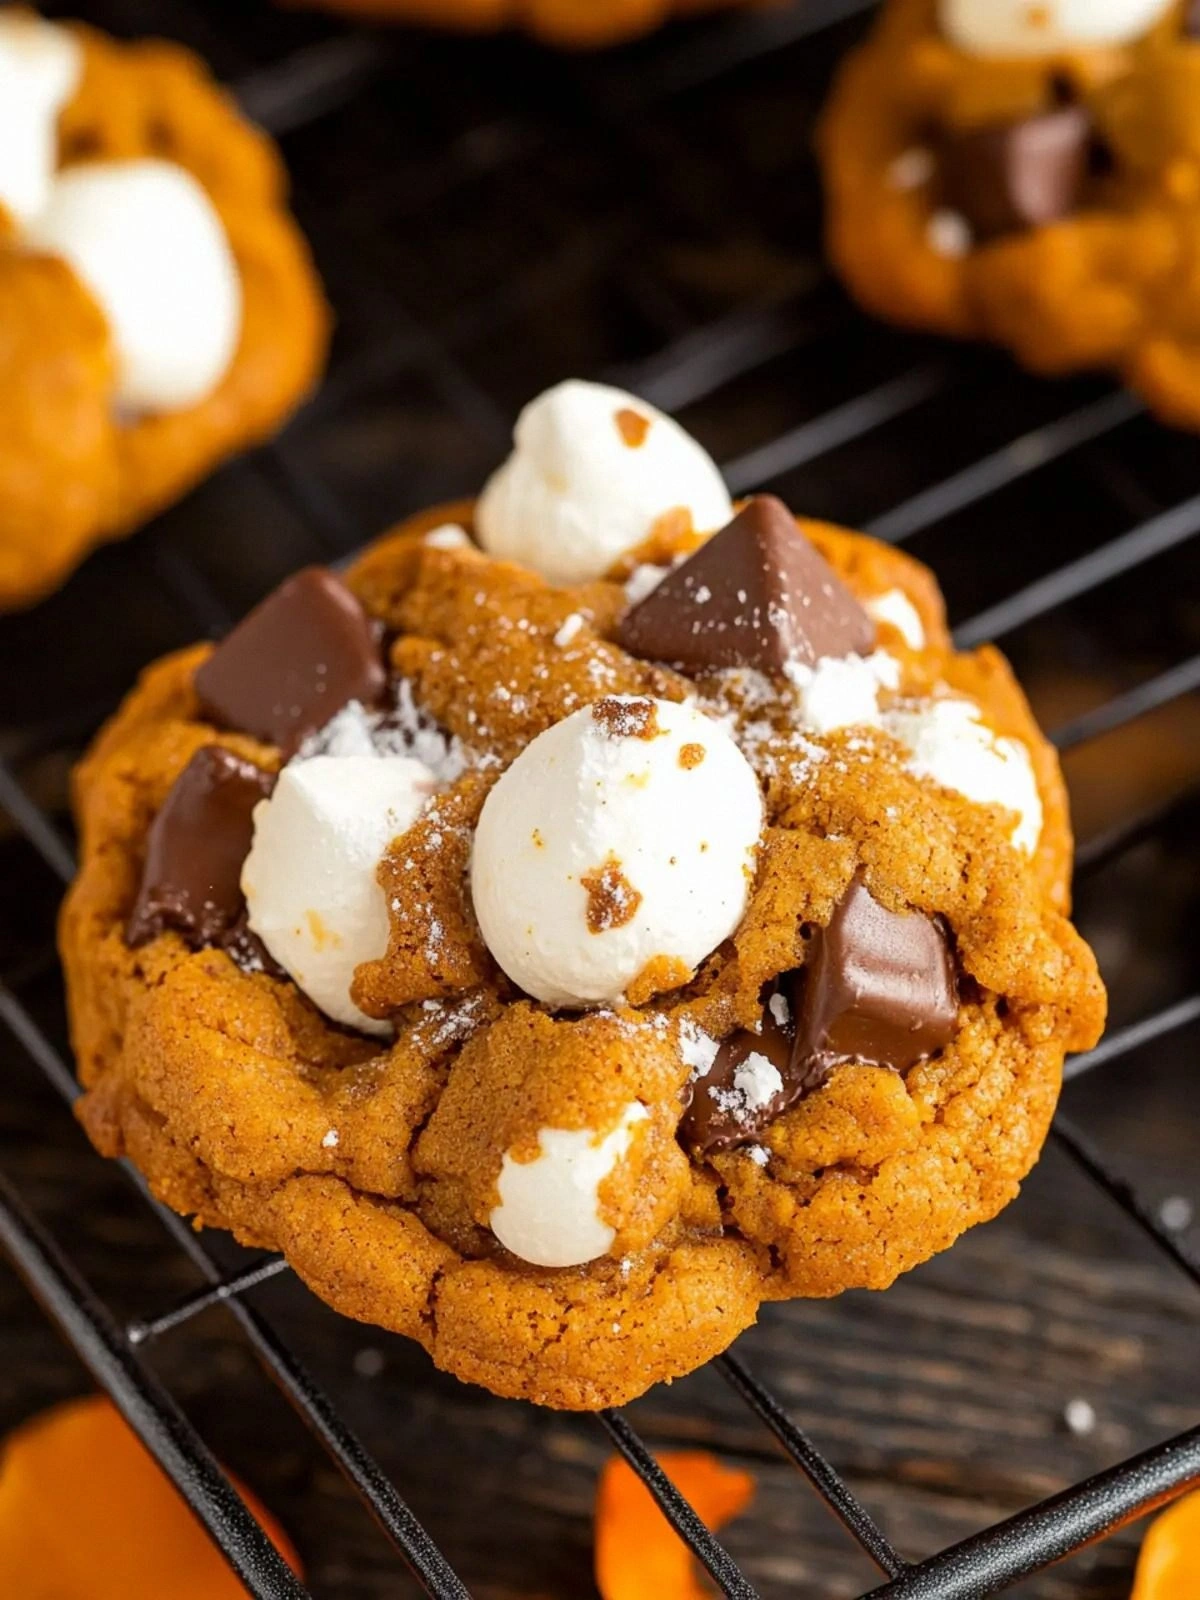
- Divide the dough into two equal portions. For the first portion, roll it into 1.5-inch balls and place them on the prepared baking sheet. For the second portion, flatten the dough with your hand, sprinkle a generous amount of chocolate chips, mini marshmallows, and crushed graham crackers on top, and then cover with the remaining dough. This layering creates a dramatic finish and ensures that the chocolate and marshmallows melt into the dough as it bakes. The graham crackers add a delightful crunch that contrasts with the gooey center. Place the second portion carefully on the sheet to avoid spilling the toppings. This step is where the magic happens.
- Press the top portion gently over the toppings, sealing the edges to prevent the filling from leaking during baking. Use a fork to create a decorative pattern on top, which also helps the heat distribute evenly. The pattern should be shallow; you don’t want to cut through the dough completely. This creates an almost rustic, campfire look that is visually appealing. The sealed edges also ensure the chocolate and marshmallows stay inside, giving each bite a rich, molten center. The dough should look slightly domed, indicating that it’s ready to bake.
- Bake in the preheated oven for 30 minutes, or until the edges are golden brown and the center looks set but still slightly soft. The cookies will rise as they bake, forming a beautiful dome. Remove them from the oven and let them cool on the sheet for 5 minutes before transferring to a wire rack. The cooling period allows the interior to set, preventing them from breaking apart. The aroma at this point is heavenly—think toasted marshmallows and warm pumpkin spice. The cookies should still be slightly warm when you take the first bite.
- Once cooled, slice each cookie in half horizontally. The top half will reveal the gooey chocolate, marshmallow, and graham cracker center, while the bottom half provides a firm, buttery base. This slicing technique is essential for that classic s’mores experience. If you prefer a softer bite, you can skip slicing and eat the cookie whole, but the contrast of textures is a key part of the flavor profile. Store the cookies in an airtight container to maintain freshness. The cookies will keep for up to a week at room temperature.
- If you’re making a large batch, you can freeze the unbaked dough portions for up to 2 months. To bake from frozen, simply add an extra 5 minutes to the baking time. This step is perfect for holiday parties or when you want a quick treat later. The dough will retain its moisture and flavor even after freezing, ensuring each cookie tastes as good as the first. Remember to let the cookies sit at room temperature for 10 minutes before slicing to allow the center to soften slightly.
That's it — you did it. But hold on, I've got a few more tricks that'll take this to another level…
Insider Tricks for Flawless Results
The Temperature Rule Nobody Follows
Many bakers bake at a higher temperature, but that can cause the cookies to brown too quickly on the outside while staying undercooked inside. I always set my oven to 350°F (175°C) and keep a close eye on the first batch; the edges should be just turning golden without burning. If your oven runs hot, reduce the temperature by 25°F or use a lower rack. This trick ensures that the chocolate and marshmallows melt evenly, creating that perfect gooey center. I’ve seen friends who skip this step and end up with hard, burnt cookies that taste like cardboard.
Why Your Nose Knows Best
The aroma of the dough as it bakes is a reliable indicator of doneness. When the scent of toasted marshmallows and pumpkin spice fills the kitchen, the cookies are almost ready. I keep a timer set to 28 minutes and then check the smell; if it’s not yet there, give it a couple more minutes. This sensory checkpoint is essential because ovens vary and the cookie’s texture can be ruined if you rely solely on the timer. Trust your nose and you’ll always bake the perfect batch.
The 5‑Minute Rest That Changes Everything
After removing the cookies from the oven, let them rest on the baking sheet for 5 minutes before transferring to a wire rack. This short rest allows the interior to set, preventing the cookies from breaking apart. The heat continues to cook the center slightly, ensuring the chocolate and marshmallows are fully melted. Many bakers skip this step and end up with cookies that crumble under their own weight. I’ve seen a friend try this once, and the cookies collapsed like a paper airplane.
Keep the Dough Cool
If your dough is too warm, the chocolate chips may melt prematurely, causing the dough to become overly sticky and difficult to handle. Chill the dough in the refrigerator for 30 minutes before shaping. This makes the dough firm enough to roll and shape without sticking to your hands. I’ve tried this trick with a friend who struggled with sticky dough, and the difference was night and day. The cookies turned out crispier on the edges and chewy inside.
Use a Silicone Mat for Easy Release
Parchment paper is great, but a silicone baking mat offers an even better release surface and can be reused countless times. The mat also ensures a consistent baking surface, preventing the cookies from sinking or spreading unevenly. I’ve used a silicone mat for the last three years, and it has saved me from countless sticky situations. If you’re making a large batch, the mat can hold more cookies at once, maximizing oven space.
Creative Twists and Variations
Nutty Crunch Variation
Swap the graham crackers for crushed pecans or walnuts to add a nutty crunch that pairs wonderfully with the pumpkin flavor. Toast the nuts lightly before crushing to enhance their aroma. This version is perfect for those who love a bit of texture and a richer taste profile. The nuts also add healthy fats, making the cookie a little more balanced.
Chocolate‑Heavy Edition
Increase the chocolate chips to 1.5 cups and add a tablespoon of cocoa powder to the dough for a deeper chocolate flavor. This variation turns the cookie into a chocolate lover’s dream while still retaining the pumpkin base. The extra chocolate chips create a gooey, molten center that’s hard to resist. Serve with a glass of cold milk for the ultimate treat.
Spiced Latte Twist
Add a teaspoon of instant espresso powder to the dough for a subtle coffee undertone that complements the pumpkin spice. The espresso enhances the chocolate’s richness, creating a sophisticated flavor profile. This version is ideal for coffee lovers who want a dessert with a caffeine kick. Pair it with a latte for a cozy fall afternoon.
Gluten‑Free Adaptation
Use a gluten‑free all‑purpose flour blend in place of regular flour, and add 1 tablespoon of xanthan gum to improve structure. This adaptation retains the cookie’s chewy texture and buttery flavor while making it suitable for gluten‑sensitive guests. The xanthan gum helps bind the dough, preventing it from falling apart. Test a small batch first to ensure the texture meets your expectations.
Vegan Version
Replace the butter with coconut oil or vegan butter, use maple syrup instead of brown sugar, and swap the mini marshmallows for vegan marshmallow squares. This vegan version stays true to the original flavor profile while accommodating dietary restrictions. The coconut oil adds a subtle tropical note that pairs surprisingly well with pumpkin. The result is a cookie that’s both indulgent and ethical.
Holiday Spice Boost
Add a pinch of ground cloves and a dash of nutmeg to the spice mix for a more aromatic holiday flavor. The cloves provide a warm, floral note, while the nutmeg adds a subtle sweetness. This variation is perfect for Christmas or Thanksgiving gatherings, creating a festive atmosphere in every bite. The cookies will smell like a holiday kitchen, instantly lifting spirits.
Storing and Bringing It Back to Life
Fridge Storage
Store the cooled cookies in an airtight container at room temperature for up to a week. The airtight seal prevents moisture loss and keeps the cookies fresh. If you prefer a firmer texture, place the container in the refrigerator for up to 10 days, but allow the cookies to return to room temperature before serving. The chocolate and marshmallow centers may slightly firm up in the fridge, but they’ll still be delightful. This method is ideal for those who bake in advance for parties.
Freezer Friendly
Wrap individual cookies in plastic wrap and place them in a freezer bag for up to 2 months. The freezer preserves the flavor and texture, allowing you to enjoy a fresh cookie whenever you like. When ready to eat, let the cookies thaw at room temperature for 15 minutes before slicing. The chocolate and marshmallows will remain gooey, and the dough will retain its buttery tenderness. Freezing is a lifesaver for holiday baking.
Best Reheating Method
Reheat the cookies in a preheated oven at 300°F (150°C) for 5 minutes, or microwave on low for 20 seconds. Add a tiny splash of water before reheating; this steams the cookie, restoring moisture and preventing it from drying out. The result is a cookie that feels freshly baked, with a soft center and a crisp edge. If you’re in a hurry, a quick toast in a skillet over medium heat works as well. The key is gentle heat to preserve the gooey center.