Picture this: a bright Saturday morning, the kitchen humming with the sound of the blender, and a sudden realization that the pantry is a barren wasteland of dry cereal and stale toast. I was about to surrender to the void of breakfast monotony when a friend dared me to whip up something that would make the neighbors stop by for a bite. That dare became a culinary mission, and I found myself rummaging through the fridge, discovering a tub of shredded potatoes that had been sitting unnoticed for weeks. The moment I tossed them into a bowl, the air filled with the earthy scent of fresh starch, and I knew this was the start of something extraordinary. If you’re ready to turn a humble potato into a breakfast hero, stick with me.
The first thing that struck me was the texture—crisp on the outside, fluffy on the inside—like a golden, buttery sunrise that melts in your mouth. As the mixture cooked, the sizzling sound was a soundtrack of anticipation, each crackle promising a new layer of flavor. The aroma that rose from the waffle maker was a savory, cheesy invitation that made my stomach do somersaults. I could taste the subtle sweetness of the potatoes, the sharp bite of paprika, and the comforting hug of melted cheese, all wrapped in a protein-rich, low-carb blanket. This isn’t just another hashbrown; it’s a culinary revelation that will make you question every other breakfast you’ve ever made.
What sets this version apart is that it doesn’t rely on heavy batter or sugary sauces. Instead, it uses a simple blend of shredded potato, eggs, cheese, and coconut flour to create a structure that holds together like a perfectly baked loaf. The secret weapon is the coconut flour, which absorbs moisture without adding carbs, giving the chaffle a tender crumb that feels like a cloud. I dared you to taste this and not go back for seconds—trust me, your taste buds will thank you. The result is a dish that is both indulgent and mindful, a breakfast that satisfies cravings without the guilt.
Let me walk you through every single step—by the end, you'll wonder how you ever made it any other way. The journey starts with a few simple ingredients, a trusty waffle maker, and a willingness to experiment. I’ll share the exact measurements, the precise timing, and the subtle cues that signal perfection. And when you’re ready, you’ll have a breakfast that’s as Instagram‑worthy as it is delicious. Ready? Let’s dive in.
What Makes This Version Stand Out
- Flavor: The combination of earthy potatoes, sharp cheese, and a hint of paprika creates a savory profile that feels like comfort food on steroids. The subtle sweetness of the potatoes balances the richness of the cheese, giving each bite a complex, satisfying depth. This flavor profile is hard to replicate with traditional hashbrowns or pancakes.
- Texture: The coconut flour absorbs excess moisture, allowing the chaffle to crisp up like a golden waffle while remaining tender inside. The result is a mouthfeel that’s simultaneously crunchy and airy, unlike any other breakfast staple. It’s the perfect marriage of crisp and fluffy.
- Health: With only 30 grams of carbs per serving, this recipe fits comfortably into low‑carb and keto diets. The protein comes from eggs and cheese, while the potatoes add fiber and essential vitamins. It’s a guilt‑free indulgence that still feels indulgent.
- Convenience: No pre‑mixing or long preparation—just shred, whisk, and cook. The entire process takes under 45 minutes, making it ideal for busy mornings. It’s a quick fix that doesn’t sacrifice flavor.
- Versatility: This chaffle can be served sweet or savory, topped with anything from avocado to maple syrup. The base is neutral enough to pair with a variety of ingredients, giving you endless creative possibilities. It’s a blank canvas ready for your culinary imagination.
- Make‑Ahead Potential: You can prepare the batter ahead of time and refrigerate it for up to 24 hours, making breakfast a breeze on hectic days. The batter stays fresh, and the chaffle retains its crispness when cooked later. It’s a game‑changer for the time‑constrained.
- Audience: From keto enthusiasts to families looking for a healthier breakfast, this dish appeals to a wide spectrum. The flavors are bold yet approachable, making it a crowd‑pleaser at any gathering. It’s the kind of recipe that turns skeptics into believers.
- Presentation: The golden, caramelized edges and the melty cheese pull create a visual treat that’s almost too pretty to eat. The chaffle’s shape is perfect for plating, and its vibrant colors make it Instagram‑worthy. You’ll be proud to serve it to guests.
Alright, let's break down exactly what goes into this masterpiece…
Inside the Ingredient List
The Flavor Base
Shredded potato is the cornerstone of this chaffle, providing a subtle sweetness and a hearty texture that stands up to the heat of the waffle maker. Fresh potatoes give a bright, clean flavor, while frozen shredded potatoes are a convenient alternative that still delivers excellent results. If you’re feeling adventurous, try adding a pinch of smoked paprika to the mix for a smoky undertone that lingers on the palate. Skipping the potatoes would strip the dish of its core identity, turning it into a flat, batter‑like waffle that lacks bite.
The Texture Crew
Eggs act as the binding agent, holding the mixture together while adding a rich, silky mouthfeel. The protein in the eggs also contributes to the browning process, creating a golden crust that’s both visually appealing and flavorful. A single large egg is enough for four servings, but you can double the quantity if you prefer a more robust structure. Omitting eggs would result in a crumbly batter that falls apart during cooking.
The Unexpected Star
Coconut flour is the unsung hero that absorbs moisture and keeps the chaffle from becoming soggy. Its high fiber content adds a subtle nutty flavor that complements the cheese, while its low carbohydrate profile makes it ideal for keto and low‑carb diets. Use just a small amount—two tablespoons—to avoid a gritty texture. If you can’t find coconut flour, a tablespoon of almond flour works as a close substitute, though it will alter the flavor slightly.
The Final Flourish
Shredded cheese—Mozzarella for meltiness or cheddar for sharpness—adds a creamy, gooey layer that pulls apart beautifully when you cut into the chaffle. The cheese also enhances the browning process, creating a caramelized crust that’s a feast for the eyes. Coconut flour and cheese work together to create a crisp exterior with a tender interior. If you’re dairy‑free, try a blend of nutritional yeast and a plant‑based cheese alternative for a similar effect.
Everything's prepped? Good. Let's get into the real action…
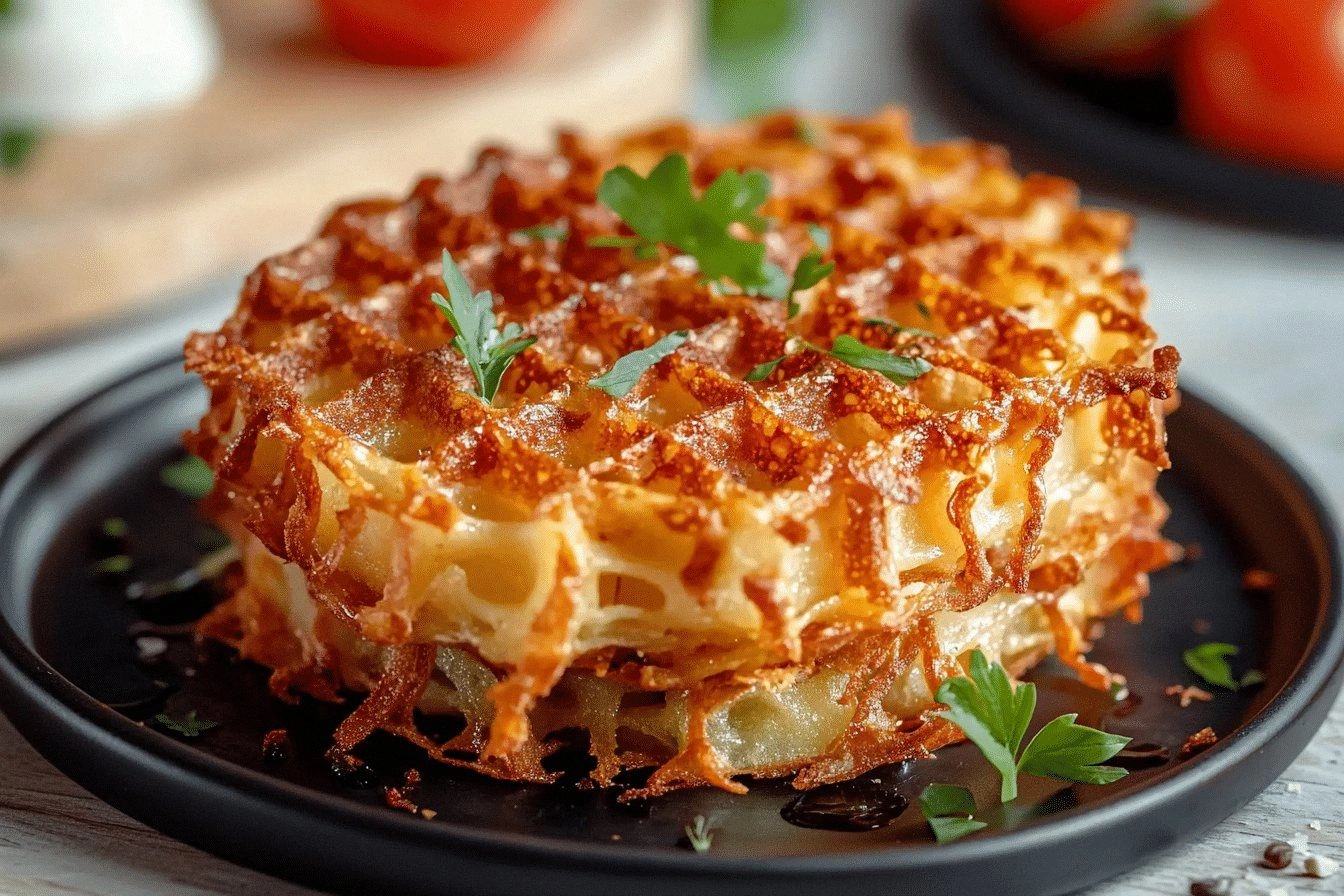
The Method — Step by Step
- Prepare the Shredded Potato: If you’re using fresh potatoes, peel and grate them finely; for frozen, let them thaw briefly and squeeze out excess moisture with a clean towel. The goal is to achieve a texture that’s almost like a fine griddle batter. This step ensures the chaffle will hold together and crisp up nicely. Remember, moisture is the enemy of crunch.
- Whisk the Eggs: In a medium bowl, crack the four eggs and whisk them until the whites and yolks are fully blended. Add a pinch of salt, pepper, garlic powder, and paprika to the eggs for a flavor base that will permeate every bite. The whisked eggs provide the protein matrix that binds the potatoes and cheese together. Don’t rush this step; a well‑mixed egg mixture is crucial for a smooth batter.
- Combine Ingredients: Add the shredded potato to the eggs and stir until fully coated. Sprinkle in the coconut flour, mixing until the mixture thickens slightly and becomes cohesive. Fold in the shredded cheese, ensuring even distribution so every bite has that melty, gooey center. The mixture should look like a thick, buttery batter that clings to the sides of the bowl.
- Preheat the Waffle Maker: Set your waffle maker to medium heat and let it preheat for about 5 minutes. Lightly grease the plates with a brush of oil or a small pat of butter to prevent sticking. The right temperature ensures a crisp exterior while keeping the interior tender. A preheated waffle maker also reduces cooking time, saving you precious minutes.
- Pour and Cook: Spoon the batter into the waffle maker, filling each section about 3/4 full. Close the lid and cook for 6–8 minutes, or until the chaffle turns golden brown and the edges pull away from the plates. The sizzle you hear is the batter beginning to caramelize, a cue that the texture is perfect. Keep an eye on the color; you want a deep, caramelized hue.
- Repeat: Continue pouring the remaining batter, making sure each chaffle is evenly sized. The cooking time stays consistent, but keep a close watch; the last batch may finish slightly faster. This consistency ensures every portion is identical in flavor and texture. Remember, patience is key.
- Serve Immediately: Remove the chaffles from the waffle maker and let them rest for a minute before cutting. The rest period allows the cheese to set slightly, preventing a gooey mess when you slice. Serve hot with your favorite toppings—salsa, avocado, or a drizzle of hot sauce. The aroma will make your kitchen feel like a breakfast haven.
- Optional Resting: If you’re preparing ahead, let the chaffles cool completely, then wrap them tightly in parchment paper and store in the refrigerator for up to 24 hours. When ready to eat, reheat in a preheated oven at 375°F (190°C) for 5–7 minutes. This step restores the crispness without losing the fluffy interior. It’s a lifesaver on busy mornings.
That's it — you did it. But hold on, I've got a few more tricks that'll take this to another level. These small adjustments can elevate the flavor profile and texture even further, ensuring each bite is unforgettable.
Insider Tricks for Flawless Results
The Temperature Rule Nobody Follows
Many cooks underestimate the importance of a properly preheated waffle maker. A temperature that’s too low will result in a soggy chaffle, while too high will burn the exterior before the interior cooks. Aim for a medium setting, and test with a small spoonful of batter; it should sizzle instantly but not scorch. This simple tweak guarantees a golden crust every time.
Why Your Nose Knows Best
The aroma is the first indicator of doneness. As the chaffle cooks, the smell will shift from raw batter to a rich, nutty scent. If you notice a faint metallic taste, it’s a sign the batter is still too wet. Trust your nose; it’s a reliable guide to avoid overcooking or undercooking.
The 5-Minute Rest That Changes Everything
Allowing the chaffles to rest for 5 minutes after cooking lets the cheese set and the steam to escape. This rest period prevents the interior from becoming gummy and ensures the edges stay crisp. A quick rest also makes cutting easier, reducing the risk of tearing the delicate structure.
Cheese Choice Matters
Mozzarella provides a meltier texture, while cheddar offers a sharper bite. Mixing both can give you the best of both worlds—cheesy goo and bold flavor. If you prefer a milder taste, try adding a splash of cream cheese to the batter; it adds richness without overpowering the other ingredients.
Stir, Don’t Scramble
When mixing the batter, stir gently to avoid incorporating too much air. Over‑whisking can lead to a dense, rubbery texture. A gentle fold keeps the batter light and airy, allowing the chaffle to rise slightly during cooking.
Keep It Moist
If the batter feels too dry, add a tablespoon of milk or a splash of water. This small adjustment restores moisture without compromising the low‑carb nature. A moist batter ensures a tender interior, while a dry one can result in a hard, crumbly texture.
Creative Twists and Variations
This recipe is a playground. Here are some of my favorite ways to switch things up:
Vegan Version
Replace eggs with a flaxseed mixture (1 tablespoon flaxseed meal + 3 tablespoons water) and use a dairy‑free cheese alternative. The texture stays similar, but the flavor profile shifts to a more earthy, nutty tone. This version is perfect for plant‑based diets without sacrificing the classic chaffle experience.
Spicy Jalapeño Chaffle
Add finely diced jalapeños to the batter for a fiery kick. The heat pairs beautifully with the mild potatoes and sharp cheese, creating a flavor explosion. Serve with a side of cool yogurt or a squeeze of lime to balance the heat.
Herb‑Infused Chaffle
Stir in chopped fresh herbs—such as rosemary, thyme, or oregano—for an aromatic twist. The herbs infuse the batter with subtle, fragrant notes that elevate the dish from simple to sophisticated. A sprinkle of fresh herbs on top after cooking adds a fresh burst of flavor.
Breakfast Sandwich Chaffle
Use the chaffle as a base for a breakfast sandwich—layer scrambled eggs, bacon, avocado, and a dash of hot sauce. The chaffle’s sturdy yet fluffy structure holds the fillings together, creating a handheld breakfast delight. This variation turns the dish into a portable, satisfying meal.
Sweet Cinnamon Chaffle
Add a teaspoon of cinnamon and a splash of vanilla extract to the batter for a sweet twist. Serve with a light dusting of powdered sugar or a drizzle of honey. This version is a delightful treat for those who love a touch of sweetness in their breakfast.
Cheesy Spinach Chaffle
Fold in sautéed spinach and a pinch of nutmeg for a green, savory variation. The spinach adds a pop of color and a boost of vitamins, while the nutmeg introduces a subtle warmth. This version is a nutritious, flavor-packed option for health‑conscious cooks.
Storing and Bringing It Back to Life
Fridge Storage
Place the cooled chaffles in an airtight container or zip‑lock bag. Store in the refrigerator for up to 24 hours. When you’re ready to eat, pop a chaffle in a toaster or oven at 350°F (175°C) for 3–4 minutes until heated through. The texture will remain crisp and the cheese will stay melty.
Freezer Friendly
Wrap each chaffle individually in parchment paper, then stack them in a freezer bag. Freeze for up to 3 months. To reheat, place the wrapped chaffle directly on a preheated oven rack at 375°F (190°C) for 10 minutes. The parchment protects the surface and prevents freezer burn.
Best Reheating Method
The oven is the gold standard for reheating, as it restores crispness without drying out the interior. For a quick microwave fix, place the chaffle on a microwave‑safe plate with a damp paper towel and heat for 30–45 seconds. However, the microwave will soften the edges, so the oven remains the preferred method.
Add a tiny splash of water before reheating — it steams back to perfection, giving the chaffle a fresh, moist interior while maintaining a crisp exterior. This trick keeps the chaffle from becoming rubbery and ensures a satisfying bite.