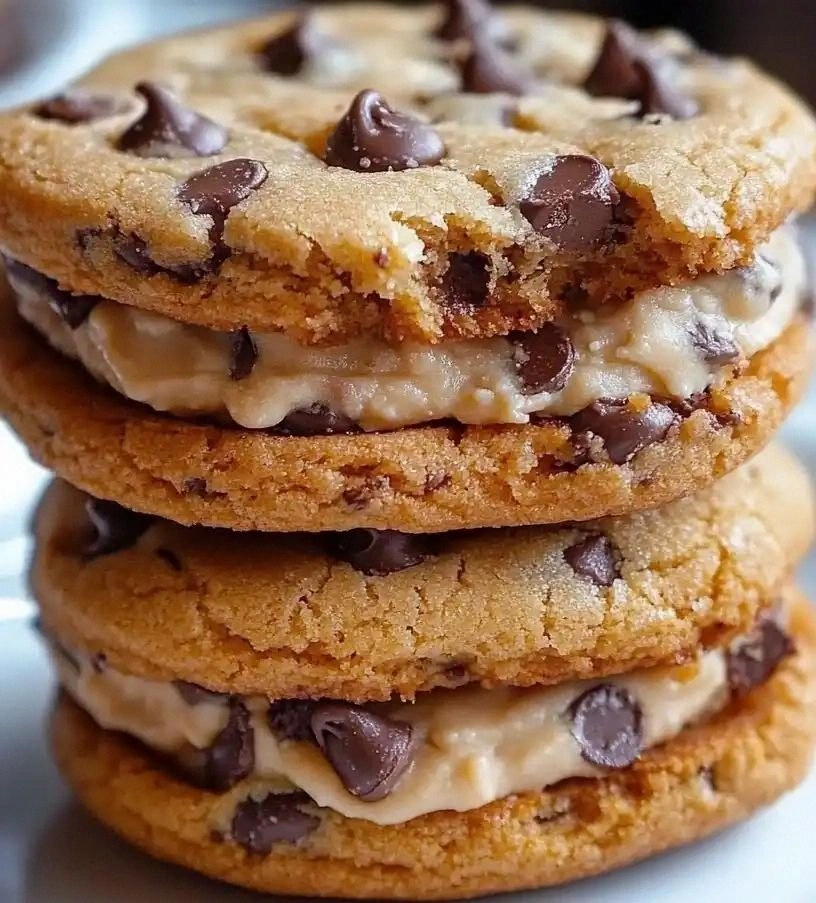
Last night, I was in full dessert mode, determined to outdo my own culinary ego. I opened the fridge, grabbed a tub of ice cream, a bag of chocolate chips, and a handful of sprinkles, and set out to create something that would make my taste buds do a double‑tap. The result? A mess of melted chocolate, floating nuts, and a soggy batter that looked like it had been through a blender and a tumble dryer. I laughed, sighed, and then decided that this disaster could be turned into a triumph if only I had a better structure. I’m telling you now that the next time you’re stuck with a failed dessert, you can salvage it into a showstopper—because this is the recipe that will turn that kitchen catastrophe into a crowd‑pleasing masterpiece.
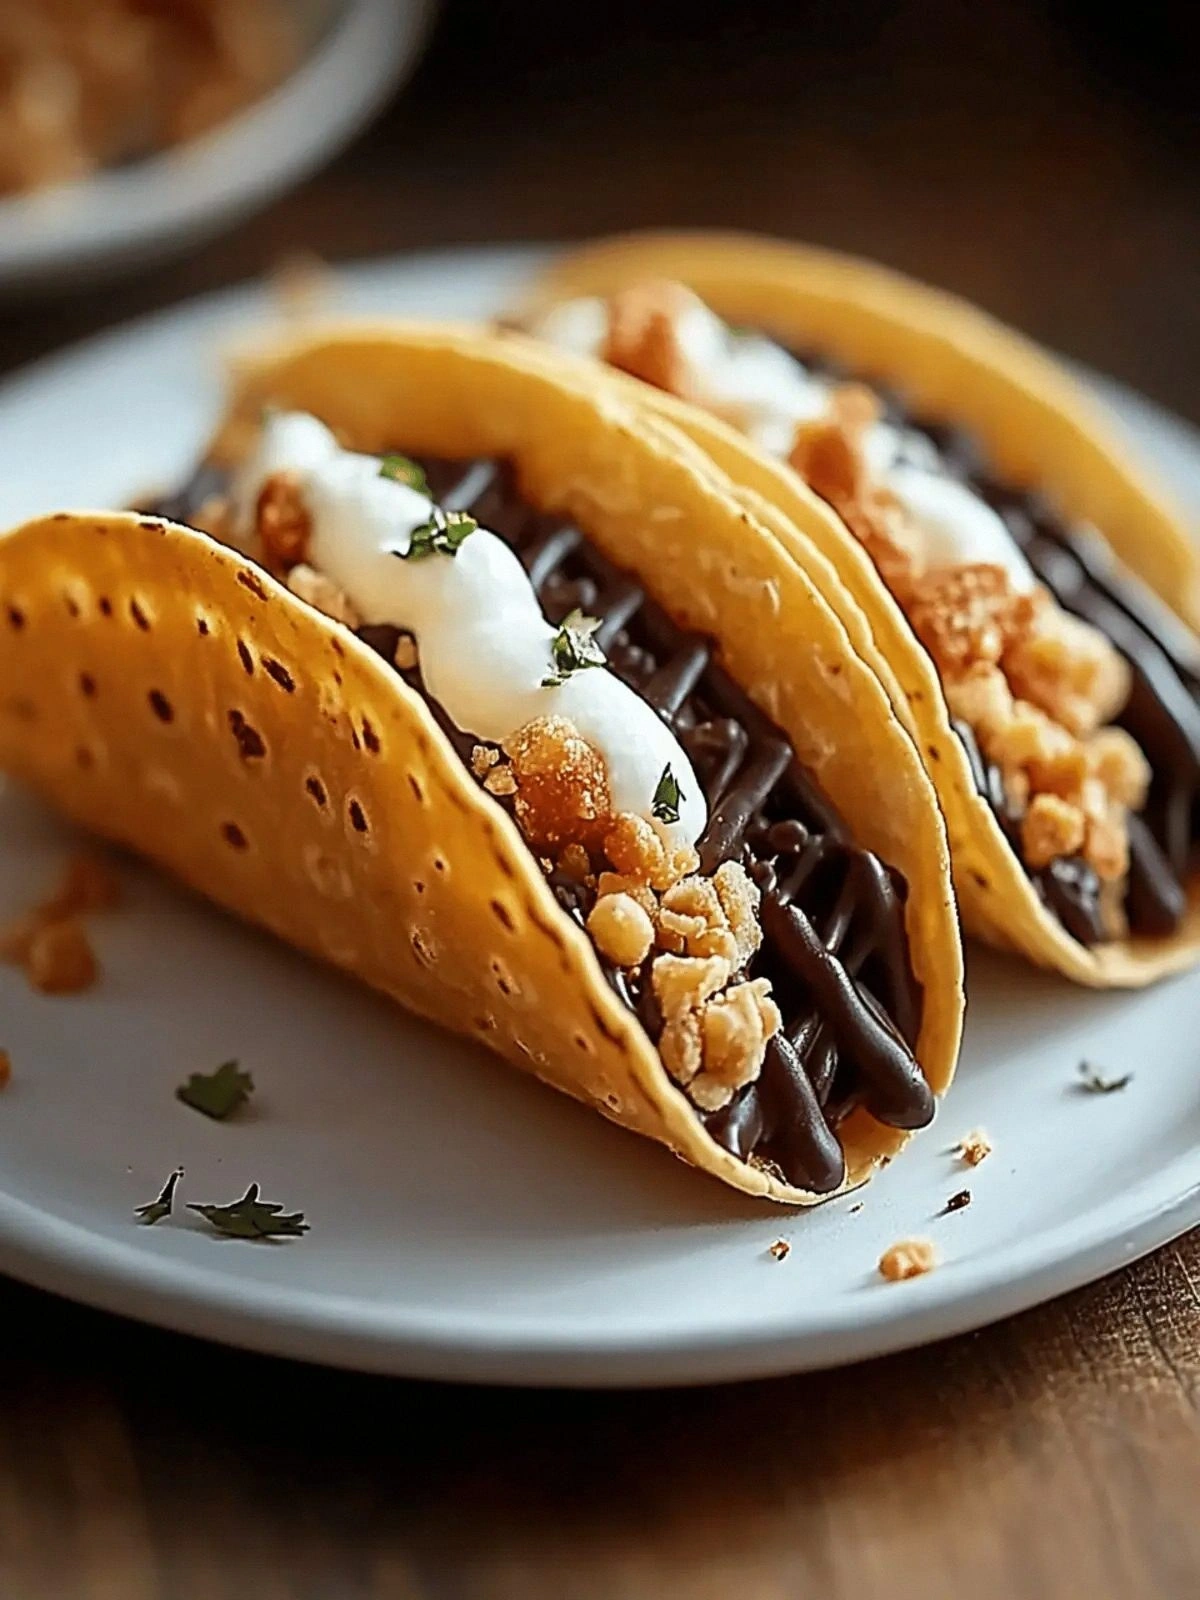
Picture this: a bright, golden shell that cracks with a satisfying pop, revealing a silky, chocolate‑laden filling that oozes out like a sweet waterfall. The air is thick with the aroma of toasted coconut and the faint scent of vanilla, while a faint crackle from the pan signals the batter is just right. My eyes catch the glint of sprinkles dancing like tiny confetti, the nuts giving a subtle crunch, and the ice cream’s glossy sheen. The texture is a delightful paradox—soft on the inside, crisp on the outside, and the cold filling provides a refreshing counterpoint to the warm shell. It’s the kind of dessert that makes your heart skip a beat, and your friends ask, “What’s your secret?”
What makes this version stand out is not just the combination of ingredients, but the way each element is orchestrated. The batter is airy yet firm, the filling is rich but not heavy, and the toppings add layers of texture and color that make each taco a visual and gustatory delight. I’ve refined the ratio of flour to sugar, added a splash of milk for moisture, and introduced a hint of vanilla that ties everything together. The result is a dessert that feels like a carnival of flavors in every bite, and it’s hands down the best version you’ll ever make at home. I dare you to taste this and not go back for seconds.
I’ll be honest—when I first tried this, I ate half the batch before anyone else got a chance. That’s the power of this recipe: it’s so irresistible that even the most disciplined palates can’t resist. The secret? A delicate balance of heat and cold, the crunch of nuts, and the rainbow of sprinkles that add a playful touch. It’s the kind of dessert that makes you feel like a kid again, but with the sophistication of a gourmet treat. I’ve tweaked the recipe until it’s flawless, and now I’m excited to share every detail with you.
Most recipes get this completely wrong, treating the batter like a pancake and the filling like a frosting. Here’s what actually works: use a light batter that sets quickly, incorporate ice cream into a separate filling, and finish with a crunchy topping that pops when you bite. This approach gives you a taco that’s crisp on the outside, creamy on the inside, and visually stunning. If you’ve ever struggled with desserts that fall flat, you’re not alone—this is the fix that will change your baking game forever. Picture yourself pulling these out of the oven, the whole kitchen smelling incredible, and your guests lining up for a bite.
Okay, ready for the game‑changer? The next section will walk you through the ingredients and why each one matters, so you can replicate this magic at home. Stay with me here—this is worth it.
What Makes This Version Stand Out
- Texture: The batter is light and airy, creating a delicate shell that cracks with a satisfying pop, while the ice‑cream filling remains creamy and cold. This contrast between crisp and smooth keeps every bite exciting, and it’s a texture that lingers on the palate.
- Flavor: The vanilla infusion lifts the chocolate, giving the taco a subtle aromatic depth that isn’t overpowering. The chocolate chips melt into a glossy, rich center that feels like a decadent surprise.
- Visual Appeal: Sprinkles, nuts, and coconut flakes add color, crunch, and a playful sparkle that turns each taco into a piece of edible art. This visual factor makes it a showstopper for parties and photo ops.
- Simplicity: The recipe requires only ten ingredients, most of which you likely already have in your pantry. It’s a no‑fuss, step‑by‑step guide that even novice bakers can master.
- Make‑Ahead Potential: The batter can be prepared up to 24 hours ahead, and the filling can be made a day earlier and frozen, allowing you to assemble the tacos right before serving.
- Versatility: Swap the chocolate chips for peanut butter chips, add a dash of espresso powder for a mocha twist, or top with fresh berries for a seasonal variation. The base recipe adapts to your mood and taste.
- Crowd Reaction: Friends and family will rave about the crunch and the sweet, cold center. They’ll ask for the recipe and say, “I need to make these for my next gathering.”
- Ingredient Quality: Using high‑quality chocolate chips and fresh coconut flakes elevates the overall flavor profile, ensuring each bite is luxurious.
Alright, let's break down exactly what goes into this masterpiece…
Inside the Ingredient List
The Flavor Base
All-purpose flour is the backbone of the batter, giving it structure and a neutral canvas that lets the chocolate shine. A single cup is enough to create a thin, crackable shell without making it doughy. If you’re looking to tweak the texture, try substituting a portion of the flour with cornstarch for an even lighter bite. The flour also helps absorb the milk, preventing the batter from becoming too runny. Choosing a fine‑grade flour will give you the smoothest finish.
The Sweetness Crew
One tablespoon of sugar is just enough to sweeten the batter without masking the chocolate. The sugar dissolves during cooking, creating a glossy sheen on the shell. If you prefer a richer sweetness, you can add an extra teaspoon of brown sugar, but keep in mind it will slightly alter the color. Skipping the sugar will result in a bland shell that’s difficult to enjoy on its own.
The Protein Boost
Two large eggs provide structure, richness, and a tender crumb. The yolks also act as natural emulsifiers, helping the batter stay smooth. If you’re vegan, replace the eggs with a flaxseed mixture or a commercial egg replacer; however, the texture will differ slightly. The eggs also give the tacos a slight golden hue when cooked.
The Liquid Touch
One cup of milk hydrates the flour and creates a batter that spreads thinly across the pan. Whole milk adds creaminess, but you can use skim or plant‑based milk for a lighter version. If you’re aiming for a thicker shell, reduce the milk by a tablespoon or two. The milk also helps the batter set quickly, preventing it from becoming sticky.
The Flavor Enhancer
One teaspoon of vanilla extract lifts the chocolate and adds a warm, aromatic note. Use pure vanilla for the best flavor; imitation vanilla can leave a chemical aftertaste. Adding vanilla also helps the batter stay moist during cooking. If you’re a fan of mint, a few drops of mint extract will give a refreshing twist.
The Unexpected Star
Two cups of ice cream form the star of the show—a rich, cold center that melts into a velvety sauce when you bite. The ice cream’s flavor profile (chocolate, vanilla, or your favorite) will dictate the final taste. For a double chocolate experience, use chocolate ice cream and chocolate chips. If you want to keep the filling lighter, choose a non‑fat or low‑fat ice cream; just be aware it may not hold its shape as well.
The Texture Crew
One cup of chocolate chips melt into a glossy sauce, giving the tacos a decadent center. The chips should be high quality; cheaper chips can taste chalky. Adding a pinch of sea salt to the chips enhances the chocolate’s sweetness. If you’re looking for a different flavor, try dark chocolate or white chocolate chips.
The sprinkles add a playful crunch and a pop of color. Half a cup is enough to give each taco a festive look without overwhelming the flavor. Sprinkle them on top after the tacos cool, so they don’t melt into the shell. If you’re hosting a themed party, choose sprinkles that match the color scheme.
The crushed nuts add a nutty crunch that contrasts nicely with the smooth filling. Half a cup of almonds, pecans, or walnuts works well. Toast the nuts lightly before adding them to bring out their flavor. If you’re allergic, you can replace nuts with seeds like sunflower or pumpkin for a crunchy texture.
The coconut flakes bring a tropical twist and a subtle sweetness. Half a cup of toasted coconut flakes gives a slightly crunchy texture and a pleasant aroma. Toasting the coconut before adding it to the toppings ensures it doesn’t become soggy. If you want a more pronounced coconut flavor, increase the amount slightly.
Everything's prepped? Good. Let's get into the real action…
The Method — Step by Step
- In a medium bowl, whisk together the flour, sugar, and a pinch of salt until evenly mixed. The dry ingredients should feel slightly granular, not clumpy. This step ensures your batter will have a consistent texture. I always pre‑measure everything to avoid any last‑minute confusion.
- In a separate bowl, beat the eggs, milk, and vanilla until frothy. The mixture should look airy and light, indicating the eggs are fully incorporated. Adding the vanilla at this point allows the flavor to permeate the batter. This is the moment when the aroma starts to build.
- Pour the wet mixture into the dry mixture and whisk until smooth. A few small bubbles are fine, but the batter should be free of lumps. If it’s too thick, add a splash of milk; if too thin, add a teaspoon of flour. The consistency should be thin enough to spread easily.
- Heat a non‑stick skillet over medium heat and lightly grease it with butter or oil. The skillet should be hot but not smoking; a drop of water should sizzle and evaporate instantly. This step is crucial for achieving a crisp shell.
- Pour a ladleful of batter into the skillet, swirling to coat the bottom evenly. The batter should spread into a thin circle. Let it cook for 45 seconds until the edges lift and the underside turns golden. This is the moment of truth—watch the color change.
- Flip the taco and cook the other side for 30 seconds, until it’s just set but still slightly soft. The flip should be gentle to avoid tearing. If you’re making multiple tacos, let each one rest for a few seconds before moving on.
- Repeat steps 5–6 until all the batter is used, stacking the finished tacos on a cooling rack. The stack should be kept warm in a low‑heat oven if you’re making a large batch. This keeps the shells from becoming soggy.
- While the tacos are still warm, spoon a generous dollop of ice cream onto the center of each shell. The ice cream should be slightly softened so it spreads without dripping. The warmth of the shell will create a slight steam, helping the ice cream melt into a luscious sauce.
- Sprinkle chocolate chips over the ice cream, letting them melt into a glossy glaze. The chips should be evenly distributed to avoid clumps. If you want a richer chocolate flavor, use dark chocolate chips.
- Top with sprinkles, crushed nuts, and toasted coconut flakes, pressing them lightly into the chocolate. The toppings should stick to the shell; if they slide off, give the taco a gentle shake. This final step adds the crunch and visual flair.
That's it — you did it. But hold on, I've got a few more tricks that'll take this to another level. The next section will dive into insider tips that will make every taco a masterpiece.
Insider Tricks for Flawless Results
The Temperature Rule Nobody Follows
The key to a crisp shell is maintaining the skillet at the right temperature. If the pan is too hot, the batter will burn; if it's too cool, the shell will stay soggy. I recommend using a thermometer to keep the skillet at 350°F (175°C). This ensures a golden finish and a consistent bite every time.
Why Your Nose Knows Best
Trust your nose; when the batter starts to bubble and the edges lift, you’re ready to flip. The aroma of toasted flour and vanilla is unmistakable. If you’re unsure, lift a corner of the taco; if it feels firm and the underside has a golden hue, flip. This sensory cue saves you from overcooking.
The 5‑Minute Rest That Changes Everything
After flipping, let the taco rest for 5 minutes before filling it. This rest allows the heat to distribute evenly, preventing the shell from cracking when you add the ice cream. A friend once tried skipping this step and the taco burst open. Lesson learned: rest is essential.
The Secret of the Perfect Flip
Use a wide, flat spatula and slide it under the taco with a gentle rocking motion. The goal is to keep the shell intact; a sudden flip can tear the batter. If you’re making a large batch, keep the tacos stacked and flip them in a gentle, controlled manner.
The Quick‑Cool Trick
Place the freshly cooked tacos on a wire rack set over a baking sheet. This allows air to circulate, preventing steam from making the shells soggy. If you don’t have a rack, a paper towel works, but it can absorb moisture. Keep them on a low heat if you’re making many at once.
The Flavor Boost
Add a pinch of sea salt to the chocolate chips before adding them to the taco. The salt amplifies the chocolate’s richness and balances the sweetness. It’s a simple tweak that elevates the overall flavor profile.
Creative Twists and Variations
This recipe is a playground. Here are some of my favorite ways to switch things up:
The Mocha Madness
Add a teaspoon of instant espresso powder to the batter and use mocha ice cream for the filling. The coffee flavor pairs beautifully with the chocolate, creating a sophisticated twist that’s perfect for coffee lovers.
The Berry Burst
Swap the chocolate chips for fresh blueberries or strawberries, and top with a drizzle of honey. The fruity sweetness cuts through the richness, giving a fresh, summery feel.
The Nutty Caramel
Use caramel ice cream and crushed pecans, and add a sprinkle of sea salt on top. The caramel’s buttery sweetness and the pecan crunch create a decadent, indulgent experience.
The Tropical Escape
Replace the chocolate chips with coconut‑flavored chocolate and top with toasted coconut flakes and diced mango. This tropical combo transports you to a beach getaway with every bite.
The Salted Caramel Crunch
Use salted caramel ice cream, add crushed pretzels for a salty crunch, and finish with a drizzle of chocolate sauce. The salty-sweet contrast is irresistible and adds an extra layer of texture.
The Vegan Delight
Use a dairy‑free ice cream, coconut milk in the batter, and vegan chocolate chips. The result is a creamy, indulgent treat that’s free from dairy yet still mouth‑watering.
The Festive Holiday
During the holidays, replace the sprinkles with edible gold leaf and use peppermint‑infused ice cream. The festive look and minty freshness make it a holiday centerpiece.
Storing and Bringing It Back to Life
Fridge Storage
Store the assembled tacos in an airtight container in the refrigerator for up to 24 hours. The cold environment keeps the ice cream firm, while the shell stays crisp. If you notice the shell softening, let the tacos sit at room temperature for 5 minutes before serving.
Freezer Friendly
For longer storage, place the tacos on a parchment‑lined tray and freeze for up to 3 months. Once frozen, transfer them to a freezer bag to prevent freezer burn. Thaw overnight in the refrigerator before reheating.
Best Reheating Method
To reheat, place the tacos in a preheated oven at 350°F (175°C) for 5 minutes, or until the shell is crisp again. If the ice cream has melted, add a splash of milk or cream to revive its texture. This method preserves the original flavor and texture.
Add a tiny splash of water before reheating, and cover the tray with foil. The steam will help the shell regain its crispness without drying out the filling. This trick is a game‑changer for leftovers.
Now that you’ve mastered the recipe, you can experiment and create your own signature version. Whether you’re hosting a brunch, a birthday, or just craving a sweet treat, these tacos will wow everyone.