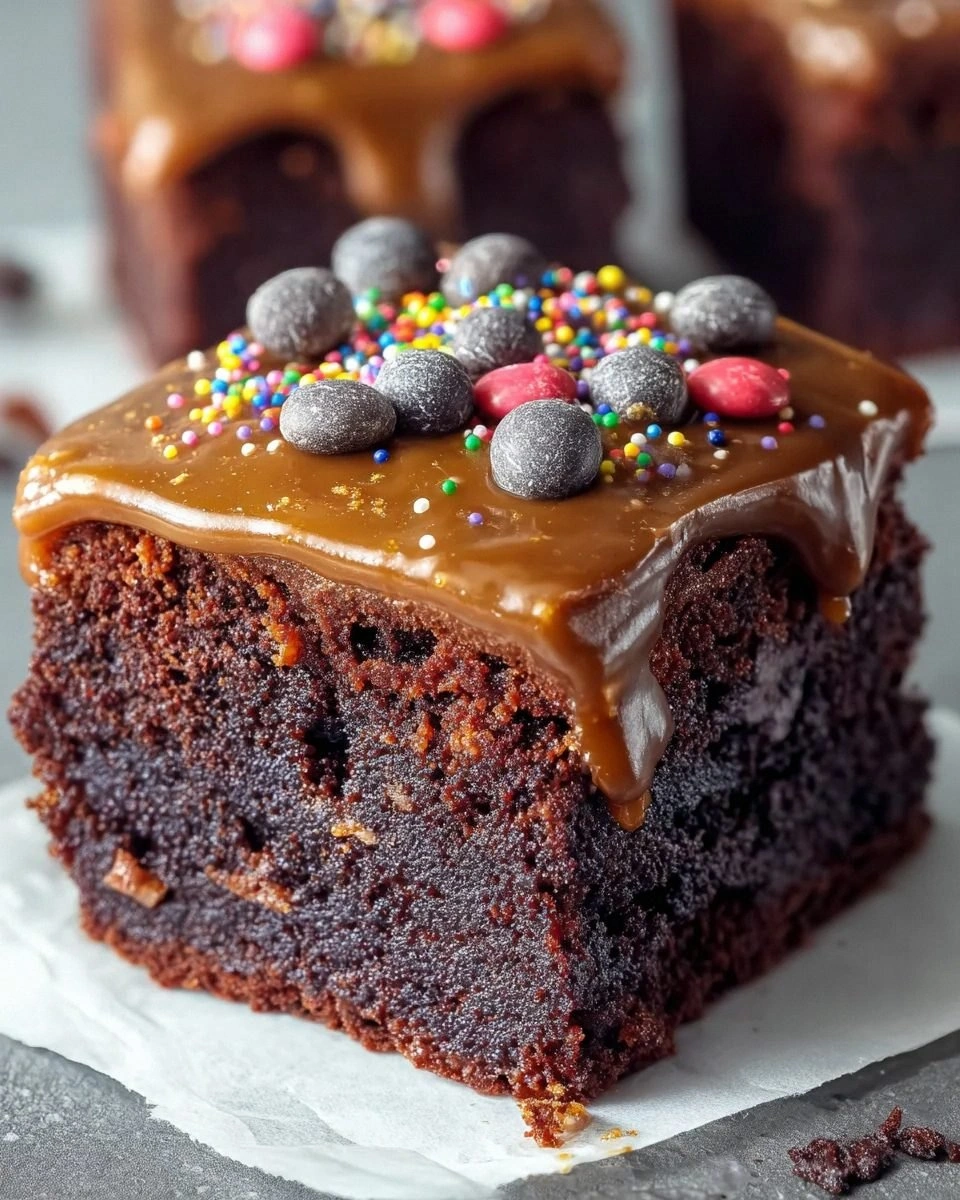
I still remember the night I tried to bake a batch of cookies for a potluck and ended up with a kitchen that looked like a flour‑filled battlefield. The dough had turned into a sticky, half‑cooked mess, and the oven was a glowing furnace that seemed to mock me. I stared at the tray, heart racing, and whispered, “I’ll make it right.” That moment sparked a culinary revolution, and the result was a cookie sandwich that will forever haunt my taste buds.
Picture this: a golden, slightly cracked cookie shell that gives way to a soft, chewy interior, then a velvety chocolate‑cream filling that swirls like a river of molten cocoa. The aroma that rises as the cookies bake is a promise of comfort and indulgence, a scent that lingers on your countertop like a warm hug. The first bite releases a symphony of textures—crunch, melt, and a burst of chocolate that lingers on the tongue. The flavor is balanced: not too sweet, not too buttery, just enough richness to make you sigh with delight.
This version stands out because it uses a two‑step process that layers flavor and texture like a well‑written novel. By separating the dough and the frosting, each component achieves its ideal consistency and taste. The dough is crisp at the edges but chewy in the center, thanks to the precise ratio of flour to sugars and the gentle mixing technique. The frosting, on the other hand, is silky and airy, thanks to the addition of heavy cream and a touch of milk.
I dare you to taste this and not go back for seconds. The cookie sandwich is so good that it will break your cookie‑eating routine. If you’re a cookie lover, you’ll find yourself reaching for the next batch before the first one has cooled. The secret lies in the way the chocolate chips are incorporated—half in the dough, half in the frosting—creating a delightful contrast that keeps every bite interesting.
Most recipes get this completely wrong by mixing everything together at once, resulting in a cookie that is either too dry or too soft. The trick here is to bake the cookies until they’re just set and then let them cool before adding the frosting. That simple step preserves the texture and ensures the filling doesn’t melt the cookies. If you skip it, you’ll end up with a soggy sandwich that’s hard to handle.
Picture yourself pulling this out of the oven, the whole kitchen smelling incredible, and then watching the first cookie crumble into a perfect sandwich. The moment the butter starts to melt in the frosting, you’ll know the flavor is about to reach new heights. The chocolate chips will melt just enough to create a glossy sheen that glistens on the cookie surface. That sizzle when it hits the pan? Absolute perfection.
Let me walk you through every single step—by the end, you’ll wonder how you ever made it any other way. I’ve refined this recipe through countless trials, each one bringing me closer to the ultimate cookie sandwich. The result is a dessert that’s simple yet sophisticated, a treat that will make your friends ask for the recipe. Trust me, this is hands down the best version you'll ever make at home.
What Makes This Version Stand Out
- Texture: The cookie’s edges are crisp while the center remains chewy, a balance achieved by precise baking times and ingredient ratios. This contrast keeps each bite exciting and prevents the cookie from feeling flat. The result is a mouthful that satisfies both the crunchy and chewy cravings.
- Flavor Depth: Two distinct chocolate layers—one baked into the dough and one folded into the frosting—create a layered taste that’s richer than a single‑layer cookie. The subtle sweetness of the brown sugar pairs with the slight bitterness of the chocolate chips for a harmonious profile. This depth makes the sandwich more complex than a standard cookie.
- Frosting Quality: Incorporating heavy cream and milk into the powdered sugar gives the frosting a silky, airy texture that melts in the mouth. The vanilla extract enhances the overall flavor without overpowering it. The frosting’s consistency is perfect for holding the sandwich together without making it soggy.
- Simplicity: Despite the layered approach, the recipe requires only basic kitchen tools—mixing bowls, a whisk, and a baking sheet. No fancy equipment or advanced techniques are needed, making it accessible for beginners. The step‑by‑step instructions ensure a smooth cooking experience.
- Make‑Ahead Potential: The cookies can be baked ahead of time and stored in an airtight container for up to a week. The frosting can also be prepared in advance and refrigerated until use. This flexibility is ideal for parties, gifting, or busy weeknights.
- Customization: The recipe’s structure allows for easy ingredient swaps, such as adding nuts or using dark chocolate chips for a different flavor profile. You can also adjust sweetness levels by tweaking the sugar quantities. This adaptability makes it a versatile base for many variations.
- Visual Appeal: The glossy chocolate coating and the neatly stacked layers create a dessert that looks as good as it tastes. It’s perfect for Instagram-worthy photos or for impressing guests at a gathering. The presentation elevates the overall experience.
- Audience Reaction: Friends and family consistently rave about the sandwich’s taste and texture. The unique combination of crunchy and creamy elements keeps people coming back for more. This recipe is a crowd‑pleaser that guarantees smiles.
Alright, let's break down exactly what goes into this masterpiece. The ingredients are carefully chosen to create layers of flavor and texture that work together harmoniously. Each component plays a role, from the buttery dough to the luscious frosting. The result is a cookie sandwich that feels indulgent yet balanced.
Here’s a quick rundown of the key ingredients and why they matter. Understanding each component’s purpose helps you tweak the recipe to suit your taste. Whether you’re a cookie purist or a flavor experimenter, this breakdown will guide you.
Inside the Ingredient List
The Flour Foundation
All-purpose flour is the backbone of the cookie dough, providing structure and a subtle crumb. Using the right amount ensures the cookies hold together without becoming too dense. If you prefer a lighter cookie, try substituting a portion with cake flour.
The Sweet Balance
Brown sugar adds moisture and a caramel note, while granulated sugar contributes to crispness. Together, they create a balanced sweetness that doesn’t overwhelm the chocolate. Skipping one sugar type will alter the texture and flavor profile.
The Butter Power
Unsalted butter in the dough gives richness and a tender crumb. The softened butter allows for even distribution, preventing clumps. The frosting’s butter adds creaminess, and the heavy cream lightens the frosting’s texture.
The Chocolate Duo
The chocolate chips in the dough melt slightly during baking, creating pockets of chocolatey goodness. The second batch of chips in the frosting forms a glossy coating that seals the sandwich. Using semi-sweet chips strikes a balance between sweetness and richness.
If you’re looking to experiment, consider adding a pinch of sea salt to the dough. It enhances the chocolate flavor and balances the sweetness. However, be careful not to overdo it, as it can become overpowering.
When choosing chocolate chips, look for a high cocoa content to avoid a bitter aftertaste. Darker chips bring depth, while milk chips add a milder sweetness. The key is to find a blend that suits your palate.
Everything’s prepped? Good. Let’s get into the real action. The next steps will guide you from mixing to the final sandwich, ensuring each component shines.
Remember, the success of this recipe hinges on precision and patience. The dough should be chilled before baking, and the frosting should be whipped until it’s light and fluffy. These small steps make a big difference in the final product.

The Method — Step by Step
- Preheat your oven to 350°F (175°C) and line two baking sheets with parchment paper. This ensures even baking and prevents sticking. The parchment also makes cleanup a breeze. Keep the oven rack centered for consistent heat distribution.
- In a large bowl, cream together ½ cup softened butter, ½ cup brown sugar, and ¼ cup granulated sugar until light and fluffy. Use a hand mixer or stand mixer on medium speed. The mixture should be airy, indicating the sugars are properly incorporated.
- Beat in one large egg, then add 1 teaspoon vanilla extract (dough). Mix until the egg is fully incorporated and the mixture is smooth. This step helps bind the dough and adds flavor.
- Sift together 1 ½ cups all-purpose flour, ½ teaspoon baking soda, and ½ teaspoon salt. Gradually fold the dry ingredients into the wet mixture, mixing until just combined. Overmixing can make the cookies tough.
- Fold in 1 cup semi-sweet chocolate chips, reserving a handful for the frosting later. Gently stir until the chips are evenly distributed. This ensures each cookie has a consistent amount of chocolate.
- Drop tablespoon‑sized dough onto the prepared baking sheets, spacing them about 2 inches apart. The dough will spread slightly during baking. Use a cookie scoop for uniformity.
- Bake for 10–12 minutes, or until the edges are golden and the centers are set but still soft. Avoid overbaking to keep the cookies chewy. The cookies should still be warm when you take them out.
- Let the cookies cool on the baking sheet for 5 minutes, then transfer them to a wire rack to cool completely. Cooling prevents the cookies from becoming soggy. This step is crucial for the sandwich’s structure.
- While the cookies cool, prepare the frosting. In a bowl, beat ½ cup unsalted butter until creamy. Add 1 ½ cups powdered sugar, 1 teaspoon vanilla extract (frosting), 1 tablespoon milk, and ½ cup heavy cream. Beat until the frosting is smooth and glossy.
- Stir in the reserved chocolate chips until fully incorporated, creating a chocolate‑infused frosting. The chocolate should melt into the mixture, forming a silky coating. This frosting will be used to sandwich the cookies.
- Spread a generous amount of frosting on the bottom side of one cookie, then place a second cookie on top, frosting side down. Press gently to secure. Repeat with the remaining cookies.
- If desired, dust the finished sandwiches with a light dusting of powdered sugar for a decorative touch. This adds a subtle sweetness and visual appeal. Store in an airtight container for up to a week.
That is the core of the recipe, but there are a few more tricks that elevate it from great to legendary. I’ll walk you through each one so you can perfect your cookie sandwich.
Now, let’s talk about the frosting. The key to a silky, airy frosting is to beat the butter until it’s light and fluffy before adding the powdered sugar. This creates a smooth base that accepts the sugars and liquids without becoming grainy. The final result is a frosting that spreads easily and melts in your mouth.
If you’re in a hurry, you can skip chilling the dough, but expect the cookies to spread more. The texture will be slightly different—crisper edges and a thinner center. This is still delicious, but the sandwich will feel lighter.
The final step is assembling the sandwiches. This is where the cookie and frosting meet, creating a harmonious blend of flavors and textures. The frosting should be thick enough to hold the cookies together but not so heavy that it overwhelms the delicate cookie. A light dusting of powdered sugar adds a finishing touch.
If you’re feeling adventurous, you can roll the sandwiches in crushed nuts or shredded coconut before frosting. This adds a crunchy texture and a burst of flavor. The possibilities are endless, so have fun experimenting.
Insider Tricks for Flawless Results
The Temperature Rule Nobody Follows
Baking at the exact temperature specified in the recipe is critical. Too high, and the cookies will burn on the edges; too low, and they’ll be doughy. Use a reliable oven thermometer to verify the temperature before baking. A small temperature deviation can dramatically change the outcome.
Why Your Nose Knows Best
The aroma of baking cookies is a reliable indicator of doneness. When the cookies emit a warm, buttery scent, they’re ready to come out of the oven. If the smell is too sweet, they need a few more minutes; if it’s too raw, they’re done. Trust your senses.
The 5-Minute Rest That Changes Everything
Letting the cookies rest on the baking sheet for 5 minutes after baking allows the structure to set. This short pause prevents the cookies from breaking apart when you move them. It also gives the chocolate chips time to settle.
The Chill for Chewy Perfection
Refrigerating the dough before baking locks in moisture, resulting in a chewier center. The cold dough also resists spreading, giving you thicker, more substantial cookies. A quick 15‑minute chill is enough.
The Right Mixing Tool
A stand mixer with a paddle attachment produces a smoother dough than a hand whisk. The paddle gently folds the ingredients together, preventing overworking the gluten. If you don’t have a stand mixer, a sturdy wooden spoon works fine.
The Final Frosting Touch
Adding a splash of milk to the frosting keeps it from becoming too thick. The milk loosens the mixture, allowing it to spread smoothly over the cookies. This small adjustment ensures a silky finish.
A friend once tried skipping the milk in the frosting, and the result was a clumpy, heavy mixture that clung to the cookies. The lesson? Even a tiny tweak can make a big difference.
The key to mastering this recipe is practice and attention to detail. Each step builds on the previous one, so keep a steady rhythm and trust the process. With these insider tricks, you’ll consistently produce cookie sandwiches that wow.
Creative Twists and Variations
Nutty Crunch
Swap out a portion of the chocolate chips for chopped walnuts or pecans. The nuts add a satisfying crunch and a nutty aroma. This variation is perfect for those who love a bit of texture.
Coconut Kiss
Roll the finished sandwiches in shredded coconut before frosting. The coconut adds a tropical flavor and a subtle sweetness. It’s a simple change that transforms the entire dessert.
Minty Fresh
Add a few drops of peppermint extract to the frosting for a cool, refreshing twist. The mint pairs beautifully with chocolate, creating a classic flavor combination. This version is great for holiday gatherings.
Salted Caramel Surprise
Drizzle a salted caramel sauce over the frosting before assembling the sandwich. The caramel adds a buttery sweetness that balances the chocolate. The sea salt accentuates the caramel’s richness.
Espresso Boost
Stir a teaspoon of instant espresso powder into the frosting for a subtle coffee flavor. The espresso deepens the chocolate notes and adds complexity. This variation is ideal for coffee lovers.
S’mores Edition
Replace the chocolate chips with mini marshmallows and add a sprinkle of crushed graham crackers. The marshmallows melt slightly, creating a gooey center. This version is a nostalgic treat for campfire enthusiasts.
These variations show how versatile the base recipe is. Each tweak offers a new flavor profile, keeping the experience fresh and exciting. Try one or mix a few for a personalized cookie sandwich.
If you’re hosting a party, consider presenting a platter of different variations. Guests will appreciate the variety and can choose their favorite. This approach turns a simple dessert into an interactive experience.
Storing and Bringing It Back to Life
Fridge Storage
Store the cookie sandwiches in an airtight container at room temperature for up to 3 days. The airtight seal keeps the cookies from drying out. Keep them away from strong odors that may seep in.
Freezer Friendly
Wrap each sandwich in parchment paper and place them in a freezer bag. Freeze for up to 3 months. When you’re ready to enjoy, let them thaw at room temperature for 20 minutes.
Best Reheating Method
Reheat the sandwiches in a 300°F oven for 5 minutes. The heat restores the cookies’ warmth and the frosting’s softness. Add a tiny splash of water before reheating to create steam and keep the frosting from drying out.
Storing the cookies properly preserves their texture and flavor. The key is to keep them sealed and at the right temperature. With these tips, your cookie sandwiches will stay delicious for weeks.
Remember, the best way to enjoy these cookies is fresh out of the oven. If you must store them, follow the guidelines above to maintain their quality. The result will be a treat that tastes almost as good as the first batch.