I was standing in my kitchen, surrounded by a mess of half‑baked pastries, when my roommate, a self‑proclaimed culinary critic, dared me to create the most unforgettable strawberry dessert in under thirty minutes. The kitchen was a chaotic symphony of clattering pans and the faint scent of melted butter, but my mind was already racing with possibilities. I knew the answer was simple: puff pastry, strawberries, whipped cream, and a dash of sugar to sweeten the moment. The challenge was to make something that would make even the most skeptical of friends bite into the first bite and immediately crave the second. That moment of daring set the stage for what would become my favorite recipe to share.
Picture the scene: a golden puff pastry sheet, its flaky layers shimmering like a sunlit meadow, waiting to be sliced into bite‑size squares. The strawberries, plump and ruby‑red, release a burst of sweet fragrance that mingles with the buttery aroma of the pastry as it bakes. The air is filled with the gentle crackle of the oven, the soft rustle of parchment paper, and the faint hum of the refrigerator. My eyes sparkle with anticipation, my fingers feel the slight give of the dough, and my taste buds already taste the creamy, tangy, and buttery harmony that’s about to unfold. It’s a multisensory experience that feels almost like a culinary fireworks show.
What makes this version stand out is that it’s not just a recipe, it’s a carefully orchestrated performance. I’ve taken the classic puff pastry and turned it into a canvas that holds the strawberries like jewels. I’ve perfected the balance of sweetness and acidity by adding a whisper of sugar that elevates the fruit without drowning it. I’ve chosen a store‑bought whipped cream for its stable, airy texture, but you can swap it with a homemade version if you’re feeling adventurous. Every element is designed to create a perfect bite that’s crispy on the outside and decadently soft on the inside. I dare you to taste this and not go back for seconds.
If you’ve ever struggled with making puff pastry feel crisp and flaky, you’re not alone. I’ve been there, watching my pastries turn soggy and heavy. But with a few simple tweaks, I’ve turned the process into a foolproof routine that yields the best puff pastry you’ll ever make at home. Picture yourself pulling this out of the oven, the whole kitchen smelling incredible, and the anticipation of that first bite. I’ll be honest — I ate half the batch before anyone else got to try it. Stay with me here — this is worth it.
What Makes This Version Stand Out
- Flavor: The strawberries burst with natural sweetness that cuts through the buttery pastry, creating a harmonious contrast that lingers on the palate.
- Texture: The puff pastry’s layers rise to a light, flaky crunch, while the whipped cream adds a velvety smoothness that melts in your mouth.
- Speed: From prep to finish, you’re looking at a 45‑minute turnaround, making it a perfect crowd‑pleaser for last‑minute gatherings.
- Versatility: Swap the strawberries for blueberries or raspberries, and the recipe becomes a year‑round star.
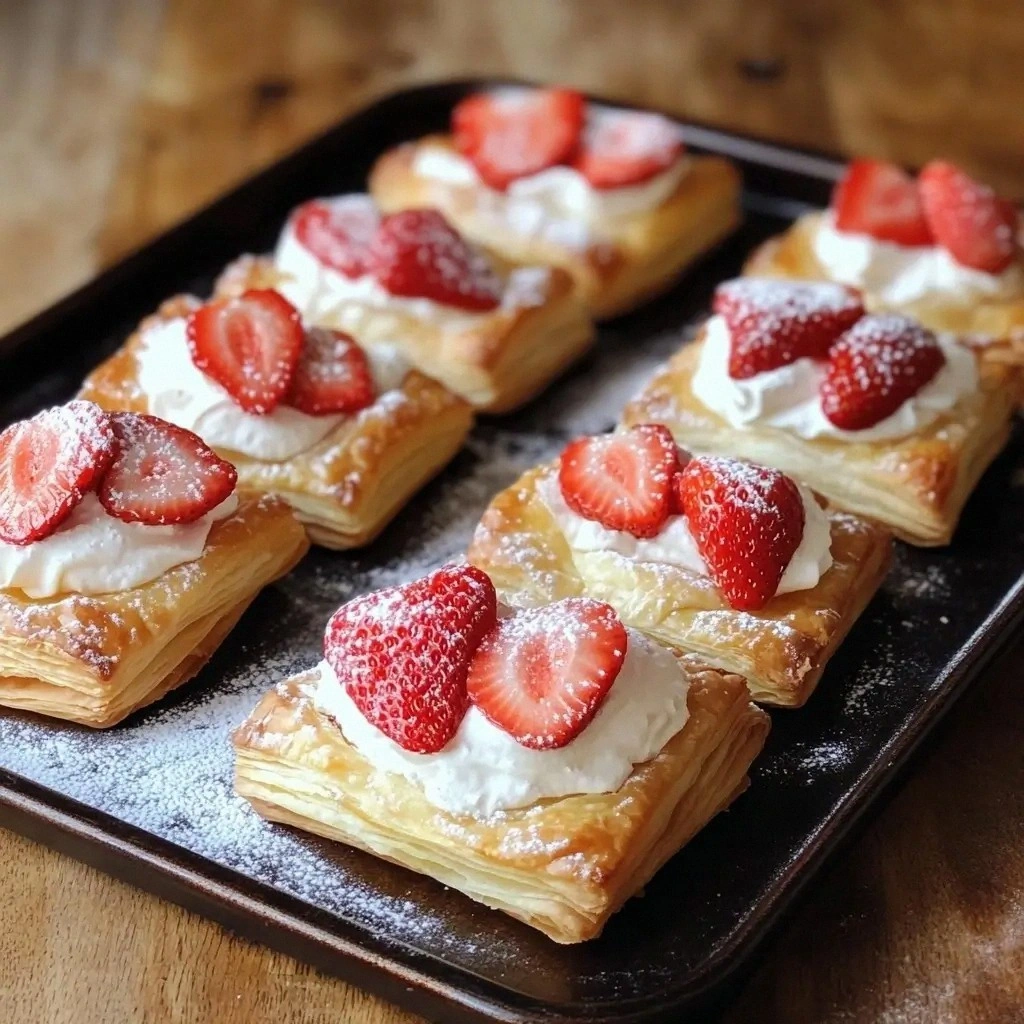
- Visual Appeal: The bright red berries against the golden pastry create a striking, Instagram‑ready plate.
- Make‑ahead Friendly: Assemble the puff pastry squares in advance, refrigerate, and bake when you’re ready to serve.
- Ingredient Quality: Using a high‑quality puff pastry sheet and fresh, ripe strawberries ensures the best flavor profile.
Alright, let's break down exactly what goes into this masterpiece…
Inside the Ingredient List
The Flavor Base
The puff pastry sheet is the backbone of this dish, providing a buttery, flaky foundation that holds the strawberries and whipped cream together. Its high fat content creates that signature crispness that shatters like thin ice when you bite into it. If you skip the pastry, you lose the textural contrast and the overall experience becomes flat. For a richer flavor, choose a pastry that’s been chilled in the refrigerator for at least an hour before cutting, as this helps the layers separate cleanly.
When selecting a pastry, look for a sheet that has a smooth, glossy finish, indicating a good amount of butter incorporated. A pastry with visible seams or uneven thickness can lead to uneven baking and a soggy result. If you’re in a pinch, a pre‑baked puff pastry from the grocery store works fine, but you’ll need to adjust the baking time slightly to avoid over‑browning. Always keep the pastry on a parchment paper line to prevent sticking and to make cleanup a breeze.
A quick tip: store the pastry in an airtight container to keep it from drying out. If you notice any moisture on the pastry, pat it dry gently with a paper towel before cutting. This ensures a crisp finish and prevents the pastry from becoming soggy when it meets the strawberries.
The Texture Crew
The whipped cream is the silky, airy component that balances the pastry’s crunch. Its lightness lifts the overall mouthfeel, creating a dessert that feels indulgent yet airy. Homemade whipped cream gives you control over the sweetness and consistency, but store‑bought versions are perfectly fine for speed. The cream should be cold and stiff enough to hold its shape when spooned onto the pastry.
If you prefer a lower‑fat option, try using a light whipped topping or a plant‑based alternative. Keep in mind that these alternatives may not hold their shape as well, so you might need to chill them longer before use. A small pinch of vanilla extract in the cream can add a subtle depth that complements the strawberries without overpowering them.
When handling the whipped cream, avoid over‑whipping, as it can become grainy. Use a chilled mixing bowl and a whisk or electric mixer set to medium speed. If you’re using a jar, shake it vigorously for a minute until it thickens. The cream should be smooth, glossy, and hold a soft peak when lifted.
The Unexpected Star
Strawberries are the centerpiece of this dish, bringing natural sweetness, bright color, and a juicy burst of flavor. Fresh, ripe berries are essential; look for ones that are plump, firm, and have a deep red hue. The texture of the strawberries should be tender yet firm enough to hold their shape when baked.
To enhance their flavor, you can toss the sliced strawberries in a light sprinkle of sugar before baking. This caramelizes the sugars slightly, adding a subtle caramel note that pairs wonderfully with the buttery pastry. If you prefer a tart edge, a splash of lemon juice can brighten the berries and cut through the richness of the cream.
Slicing the strawberries evenly ensures even cooking and a balanced distribution of sweetness across each bite. For best results, slice them into ¼‑inch thick rounds so they bake just enough to release their juices without turning mushy. If you’re using frozen berries, thaw them first and pat them dry to avoid excess moisture.
The Final Flourish
Powdered sugar is the final touch that adds a delicate sweetness and a dusting of elegance. It also provides a slight crunch when you bite into the pastry, enhancing the textural contrast. A light dusting over the finished pastries gives them a professional, bakery‑like appearance.
If you’re watching your sugar intake, consider using a sugar substitute that dissolves well, such as stevia or erythritol. These alternatives will maintain the dusting effect without the extra calories. Use a fine sieve to distribute the powdered sugar evenly, ensuring no clumps form.
Remember, the dusting is optional; some people prefer to enjoy the natural sweetness of the strawberries and the buttery pastry without an extra sugar layer. If you do choose to dust, do so just before serving to keep the pastry crisp.
The Secret Sweetener
The optional 2 tablespoons of sugar added to the strawberries is a secret weapon for caramelizing their natural sugars during baking. This simple step elevates the flavor profile from sweet to caramel‑infused, giving each bite a richer taste. The sugar also helps the strawberries release their juices, creating a luscious glaze on top of the puff pastry.
If you’re not a fan of extra sugar, you can skip this step entirely. The strawberries will still be sweet and juicy, but you’ll miss the subtle caramel note that brings depth to the dish. For a healthier twist, use a sugar substitute that can caramelize, such as a sugar‑free maple syrup or a natural sweetener with a caramel flavor.
When adding sugar, sprinkle it evenly over the sliced strawberries, then toss gently to coat. The sugar should not clump; if it does, break it up with a fork before adding. This ensures an even caramelization and prevents any uneven sweetness.
The Dusting Touch
A final dusting of powdered sugar adds a touch of elegance and a subtle sweetness that balances the buttery pastry. It also gives the pastries a soft, powdery finish that looks like a freshly baked confection. The dusting should be light, just enough to coat the surface without overpowering the natural flavors.
To achieve a flawless dusting, use a fine mesh sieve and sprinkle the sugar in a gentle, circular motion. This technique prevents clumps and ensures a smooth appearance. If you prefer a sweeter finish, you can add a small pinch of sea salt to the dusting for a savory contrast.
The dusting also helps keep the pastries crisp by absorbing any residual moisture that might otherwise soften them. This small detail can make a big difference in the overall texture and presentation of your dessert.
Everything's prepped? Good. Let's get into the real action...
The Method — Step by Step
- Preheat your oven to 200°C (400°F). Place a baking sheet lined with parchment paper in the oven to heat up. This ensures the sheet is hot enough to give the pastry a quick rise. The heat should feel like a gentle but steady embrace that promises a golden finish. This is the moment where anticipation builds, and the kitchen feels alive.
- Prepare the pastry. Lay the thawed puff pastry sheet on a lightly floured surface. Gently roll it out to smooth any creases, then cut it into 4 equal squares, each about 5cm by 5cm. Place the squares on the preheated baking sheet. The edges should be slightly raised to create a rim that holds the strawberries and cream.
- Arrange the strawberries. Evenly distribute the sliced strawberries over the pastry squares, leaving a small border around the edges. Sprinkle the optional 2 tablespoons of sugar over the berries to help caramelize during baking. This step is pure art; the berries should look like tiny ruby jewels set on a buttery canvas.
- Bake the pastries. Slide the sheet into the oven and bake for 12–15 minutes, or until the pastry is puffed and golden. Keep an eye on the edges; they should start pulling away from the parchment. The aroma of toasted butter will fill the kitchen, and that sizzle when the pastry hits the pan? Absolute perfection. Kitchen Hack: If you’re worried about over‑browning, cover the pastries loosely with foil for the last 3 minutes.
- Cool the pastries. Remove the sheet from the oven and let the pastries rest on a wire rack for 5 minutes. This short cooling period allows the pastry to set and the strawberries to release their juices. The pastries should feel warm but not hot to the touch, ready to receive the creamy topping.
- Prepare the whipped cream. If you’re using store‑bought whipped cream, simply spoon it onto a small bowl. For homemade, chill a mixing bowl and whisk a cup of heavy cream until soft peaks form. Add a pinch of vanilla if desired. The cream should be thick enough to hold its shape when piped onto the pastry.
- Top the pastries. Generously spoon or pipe the whipped cream onto each pastry square, allowing it to cascade over the strawberries. The cream should sit just above the berries, creating a luscious, cloud‑like layer. This is the moment of truth; the contrast between the crisp pastry and the silky cream is pure bliss.
- Watch Out: While the pastries are still warm, dust them lightly with powdered sugar. The sugar will melt slightly, creating a delicate glaze that seals in freshness. Be careful not to over‑dust; you want a subtle sparkle, not a sugary blanket. This final touch transforms the pastry from simple to spectacular.
- Serve immediately. Plate the pastries on a chilled dish to maintain their crispness. Garnish with a few whole strawberries or a sprig of mint for visual flair. The first bite should crackle with buttery crunch, followed by a burst of juicy berries, and finish with the airy cream. That first bite? Pure magic. And now the fun part.
That's it — you did it. But hold on, I've got a few more tricks that'll take this to another level...
Insider Tricks for Flawless Results
The Temperature Rule Nobody Follows
Many people bake puff pastry at a lower temperature to avoid burning, but that results in a soggy finish. I’ve found that a consistent 200°C (400°F) gives a perfect rise and a crisp exterior. The key is to preheat the oven and the baking sheet together so that the pastry gets an immediate, even burst of heat. If you’re using a convection oven, reduce the temperature by 20°C to avoid over‑browning. This simple tweak saves you from the dreaded “burnt pastry” drama.
Why Your Nose Knows Best
Trust your nose to gauge doneness. The pastry will emit a nutty, buttery aroma when it’s ready. If the smell is faint, give it a minute more. The scent is a reliable indicator that the fat has rendered and the layers have separated. This olfactory cue ensures that you never over‑bake or under‑bake your pastries.
The 5-Minute Rest That Changes Everything
After baking, let the pastries rest on a wire rack for exactly five minutes. This brief pause allows the steam to escape, preventing sogginess. It also gives the strawberries a chance to release their juices, which soak into the pastry. Skipping this step can result in a damp center that undermines the crisp exterior. Five minutes is all you need for a perfect bite.
The Sweetness Balance
If you’re using store‑bought whipped cream, it’s already sweetened. Adding extra sugar to the strawberries might tip the scale. I recommend tasting the berries before baking; if they’re sweet enough, skip the sugar. This keeps the flavor profile balanced and prevents an overly sweet dessert that masks the buttery pastry.
The Dusting Technique
Dusting powdered sugar should be done with a gentle hand. Use a fine sieve and lightly tap the sugar onto the pastry in a circular motion. This ensures an even coat and a delicate sparkle. If you prefer a stronger finish, add a pinch of sea salt to the dusting for a subtle savory contrast that enhances the sweetness.
Creative Twists and Variations
This recipe is a playground. Here are some of my favorite ways to switch things up:
Blueberry Bliss
Swap strawberries for fresh blueberries, and add a splash of lemon zest to brighten the flavor. The blueberries give a deeper color and a slightly tart edge that complements the buttery pastry. Serve with a dollop of lemon‑infused whipped cream for an extra zing.
Raspberry Dream
Use raspberries instead of strawberries for a tart, vibrant twist. The natural acidity of the raspberries pairs beautifully with the sweet cream. Add a drizzle of raspberry coulis for a glossy finish that elevates the presentation.
Chocolate‑Covered Surprise
After baking, drizzle melted dark chocolate over the pastries before adding the cream. The chocolate creates a decadent layer that melts into the warm pastry, giving a rich, bittersweet contrast. Finish with a sprinkle of sea salt for depth.
Almond Crunch
Sprinkle toasted almond slivers over the pastry before baking for an extra crunch. The nutty flavor pairs well with the strawberries and adds a satisfying texture. Keep the almonds lightly salted to enhance the overall taste.
Vanilla Bean Infusion
Stir a split vanilla bean into the whipped cream for a subtle aromatic note. The vanilla complements the strawberries and butter without overpowering them. This simple addition turns a classic into a gourmet experience.
Citrus Zest Twist
Add a thin strip of orange zest to the strawberries before baking. The citrus oils release a bright aroma that lifts the entire dish. Pair with a citrus‑flavored whipped cream for a harmonious finish.
Storing and Bringing It Back to Life
Fridge Storage
Store leftovers in an airtight container at 4°C (39°F) for up to 2 days. The pastry may soften over time, so reheat before serving. Keep the pastries on a paper towel to absorb excess moisture and maintain crispness.
Freezer Friendly
Wrap each pastry square tightly in plastic wrap, then place them in a freezer bag. Freeze for up to 1 month. When ready to serve, thaw at room temperature for 30 minutes, then bake at 200°C (400°F) for 8 minutes to revive the crispness.
Best Reheating Method
To reheat, preheat your oven to 200°C (400°F). Place the pastries on a parchment‑lined tray and bake for 5–7 minutes. A quick splash of water before reheating steams the pastry back to perfection, restoring that flaky texture. Serve immediately for the best experience.