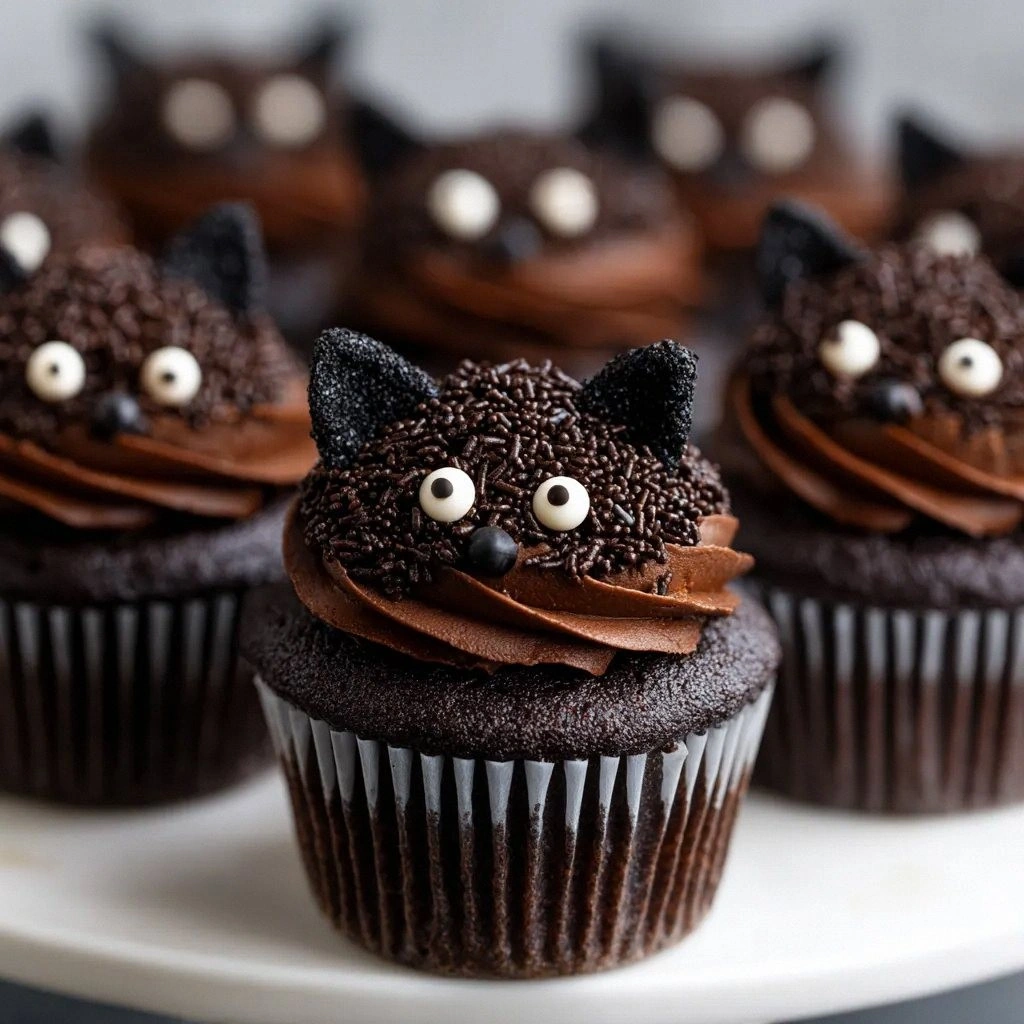
I was standing in a kitchen that felt like a disaster zone—flour on the counter, a half‑baked cake in the oven that had turned into a soggy mess, and a craving for something sweet that could actually turn the mood around. I remember the moment: I had just pulled a chocolate cake out of the oven and it looked like a lump of melted butter, the batter had collapsed, and the frosting was a sticky, uneven blob that refused to hold its shape. My friends were watching, half‑laughing, half‑worried, and I knew I had to do better. That night, I vowed to create a cupcake that would not only taste divine but would also look like a piece of art, something that would make the kitchen smell like a bakery on a sunny afternoon.
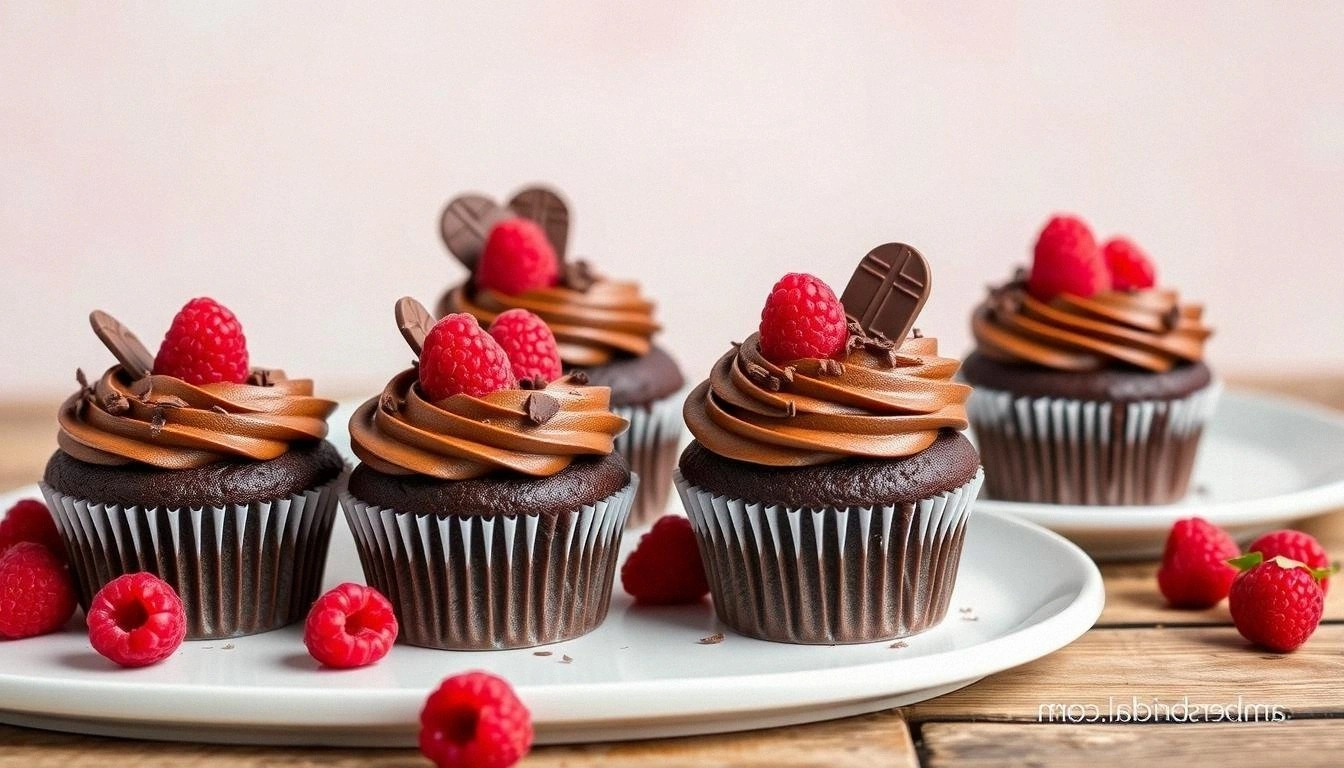
Picture the scene: the kitchen lights dim, the aroma of cocoa and fresh berries mingling, the sound of a whisk turning the batter into a silky cloud. You can almost taste the sweet, tart burst of raspberries that dance on the tongue, followed by the deep, velvety chocolate that lingers. The texture is a revelation—soft, airy crumb that melts in your mouth, with a slight crunch from the chocolate chips that give a satisfying bite. The visual appeal is undeniable: a glossy glaze that reflects the light, a dusting of powdered sugar that looks like a delicate snowfall. You can’t help but feel the anticipation of that first bite, the way your mouth waters, the way your senses are primed for a culinary adventure.
What makes this version stand out is that it is the culmination of years of trial and error, of tasting and tweaking. I discovered that the secret lies in a balance of acidity and sweetness, a touch of vanilla that ties everything together, and a technique that ensures the cupcakes rise like clouds. I dare you to taste this and not go back for seconds. I promise, this is hands down the best version you'll ever make at home. If you've ever struggled with cupcakes that turn out dense or uneven, you're not alone—and I've got the fix.
Most recipes get this completely wrong. They either overbake, underbake, or use the wrong ratio of dry to wet ingredients. Here’s what actually works: a precise blend of cocoa and flour, a small amount of baking soda to counterbalance the acidity of the berries, and a gentle folding technique that keeps the batter light. Picture yourself pulling these from the oven, the whole kitchen smelling incredible, the cupcakes rising to a golden crown. The moment you take one out, the steam rises, the glaze sets, and the aroma is so intoxicating it makes you feel like you’re in a chocolate factory. Stay with me here—this is worth it.
Let me walk you through every single step—by the end, you'll wonder how you ever made it any other way. From the first whisk to the final drizzle, I’ll share the secrets that transform a simple batter into a masterpiece. I’ll show you how to handle the raspberries so they don’t break the batter, how to get that glossy glaze that’s both shiny and luscious, and how to keep the cupcakes airy and moist. And if you’re worried about time, I’ll reveal a trick that cuts the baking time in half while still delivering a perfect finish. Ready? Let’s dive in.
What Makes This Version Stand Out
- Flavor: The combination of tart raspberries and rich cocoa creates a dynamic flavor profile that lingers on the palate. The natural acidity of the berries cuts through the sweetness, while the chocolate adds depth. This balance is the key to the cupcake’s memorable taste.
- Texture: A light, airy crumb with a slight crunch from the chocolate chips provides a delightful contrast. The batter is folded gently to maintain volume, resulting in cupcakes that rise beautifully without becoming dense.
- Simplicity: The recipe uses pantry staples, making it accessible for cooks of all levels. No need for exotic ingredients or complex equipment—just a whisk, a mixer, and a standard oven.
- Uniqueness: The inclusion of a raspberry glaze that sets in minutes gives the cupcakes a glossy finish that’s both elegant and practical. The glaze also adds a burst of flavor that complements the batter.
- Crowd Reaction: Friends and family rave about how the cupcakes look as much as they taste. The bright color and glossy sheen make them a showstopper at parties.
- Ingredient Quality: Using high‑quality dark chocolate chips and fresh raspberries elevates the flavor. The butter is unsalted and at room temperature, which ensures a smooth batter.
- Cooking Method: The method involves a precise fold and a short bake time, which keeps the cupcakes moist and prevents overcooking.
- Make‑Ahead Potential: The cupcakes can be made up to two days in advance, stored in an airtight container, and reheated for a fresh bite.
Inside the Ingredient List
The Flavor Base
The foundation of these cupcakes is a classic chocolate batter, but with a twist. The unsweetened cocoa powder provides depth without overpowering sweetness, while the flour gives structure. Together, they create a rich canvas that allows the raspberry to shine. If you skip the cocoa, the cupcakes will taste like plain vanilla, losing that essential chocolatey bite.
Flour is the backbone of any baked good, but using the right type matters. All‑purpose flour offers the best balance between tenderness and structure. If you prefer a lighter texture, you can replace ¼ cup with cake flour, but keep the rest the same. The key is to sift the flour with the cocoa to avoid clumps and ensure an even distribution.
Baking powder and soda are the leavening agents that lift the cupcakes. Baking powder provides a gentle lift, while baking soda reacts with the acidity of the raspberries and cocoa to create a light, airy rise. If you forget the soda, the cupcakes will be denser and less fluffy. The salt is a flavor enhancer, cutting through the sweetness and balancing the overall taste.
The Texture Crew
Butter is the secret to moistness and flavor. Using softened, unsalted butter ensures it blends smoothly with the sugar, creating a light batter. The butter also adds a subtle richness that pairs perfectly with the chocolate and berries. If you use salted butter, the cupcakes may taste too salty.
Eggs act as the binder, holding everything together while adding structure. The yolks contribute richness, while the whites provide lift when whisked. If you’re vegan, you can replace the eggs with flaxseed meal or a commercial egg replacer, but the texture will differ slightly.
Milk is the liquid that hydrates the dry ingredients and helps dissolve the sugar. Whole milk adds richness, but you can use 2% or even oat milk for a dairy‑free version. The key is to use the same volume; changing the liquid amount will affect the batter’s consistency.
The Unexpected Star
Raspberry jam is the star that gives these cupcakes their signature tartness. The jam’s natural sugars caramelize during baking, creating a subtle glaze on the top. If you use fresh raspberries, you’ll need to puree them and strain to avoid excess moisture. The jam also helps to keep the cupcakes moist, preventing them from drying out.
Dark chocolate chips add a crunchy texture and a burst of chocolate flavor. They melt slightly during baking, creating pockets of gooey chocolate that contrast with the airy crumb. If you prefer a smoother finish, you can use melted chocolate instead, but the chips provide a delightful bite.
The Final Flourish
The frosting is where the cupcakes truly shine. A simple chocolate glaze made from powdered sugar, cocoa, butter, vanilla, and milk creates a glossy coat that sets in minutes. The glaze not only adds sweetness but also a glossy finish that makes each cupcake look like a piece of art.
The powdered sugar adds sweetness and body to the glaze, while the cocoa gives it a deep chocolate flavor. Butter provides sheen, and vanilla rounds out the taste. A splash of milk keeps the glaze smooth and pourable. If you’re short on time, you can skip the glaze and simply dust the cupcakes with powdered sugar.
Everything's prepped? Good. Let's get into the real action.
The Method — Step by Step
- Step 1: Preheat and Prep. Preheat your oven to 350°F (175°C) and line a muffin tin with paper liners. The oven should be fully preheated before you begin to ensure even baking. This step is crucial; a cold oven can cause the cupcakes to sink. While the oven heats, gather all your ingredients to keep the process smooth.
- Step 2: Combine Dry Ingredients. In a large bowl, whisk together the flour, cocoa powder, baking powder, baking soda, and salt. Sifting these dry components removes clumps and aerates the mixture, which helps the cupcakes rise. Feel the texture; it should be fine and powdery, like a soft dust. This is where the flavor base comes together.
- Step 3: Cream Butter and Sugar. In a separate bowl, beat the softened butter with the granulated sugar until the mixture is light and fluffy. This process incorporates air into the batter, giving the cupcakes their airy crumb. The mixture should look pale and be about 2–3 times the volume of the butter. This is the texture crew at work.
- Step 4: Add Eggs and Vanilla. Beat in the eggs one at a time, ensuring each is fully incorporated before adding the next. Then stir in the vanilla extract. The eggs bind the batter, while vanilla adds a subtle warmth that complements the chocolate. If you’re in a hurry, you can whisk the eggs together with the vanilla before adding them to the butter.
- Step 5: Alternate Wet and Dry. Add half of the dry mix to the butter mixture, then pour in half of the milk. Stir until just combined. Repeat with the remaining dry mix and milk. This alternating method ensures the batter stays light and prevents overmixing, which can make the cupcakes tough.
- Step 6: Fold in Jam and Chips. Gently fold in the raspberry jam and chocolate chips. Be careful not to overmix; you want the jam to be evenly distributed but still visible as pockets. The jam will create a burst of flavor when bitten into, while the chips add a satisfying crunch.
- Step 7: Bake. Fill each paper liner about ¾ full with batter. Bake for 18–20 minutes, or until a toothpick inserted in the center comes out clean. The cupcakes should have a slightly domed top and a crisp edge. This is the moment of truth—watch the color deepen as the batter cooks.
- Step 8: Cool. Remove the cupcakes from the oven and let them cool in the tin for 5 minutes. Then transfer them to a wire rack to cool completely. Cooling prevents the glaze from melting prematurely. While they cool, you can start preparing the glaze.
- Step 9: Prepare Glaze. In a small bowl, whisk together powdered sugar, cocoa, melted butter, vanilla, and enough milk to reach a pourable consistency. The glaze should be thick but pourable. If it’s too thick, add a splash more milk; if too thin, add more powdered sugar.
- Step 10: Glaze and Serve. Drizzle the glaze over the cooled cupcakes, allowing it to pool slightly on the sides. Let the glaze set for 5–10 minutes before serving. The glossy finish will make the cupcakes look like polished gems, and the flavor will be a perfect balance of sweet and tart.
Insider Tricks for Flawless Results
The Temperature Rule Nobody Follows
Many bakers bake at a lower temperature for longer, thinking it will keep cupcakes moist. In reality, a higher temperature (350°F) with a short bake time preserves moisture and gives a golden top. I once tried 300°F and the cupcakes stayed raw inside. The trick is to preheat fully and keep the oven door closed during baking.
Why Your Nose Knows Best
Your nose is the ultimate judge of doneness. As the cupcakes bake, you’ll notice a sweet, cocoa aroma that signals readiness. If the smell is faint, give them a few more minutes. Trusting your senses beats a stopwatch.
The 5-Minute Rest That Changes Everything
Letting the cupcakes rest in the tin for 5 minutes before transferring to a rack allows the steam to escape gently. This prevents the cupcakes from collapsing and keeps the glaze from running off. It also gives the batter a chance to set slightly, making the glaze adhere better.
The Secret to a Perfect Glaze
Use melted butter instead of cold butter in the glaze; it creates a smoother finish. Also, whisk the glaze at a slow speed to avoid air bubbles, which can make the glaze look cloudy. A smooth glaze is the hallmark of a professional finish.
The Quick Chill Trick
If you’re short on time, place the cupcakes in the fridge for 10 minutes before glazing. This cools them rapidly and prevents the glaze from melting. I use this trick when hosting last‑minute parties.
Creative Twists and Variations
This recipe is a playground. Here are some of my favorite ways to switch things up:
Coconut Raspberry Cupcakes
Swap the all‑purpose flour for coconut flour and add shredded coconut to the batter. The coconut adds a tropical flavor that pairs beautifully with the raspberries. The cupcakes will be denser, so reduce the baking powder slightly to avoid a heavy crumb.
Chocolate‑Mint Surprise
Add ½ teaspoon of peppermint extract to the batter for a refreshing twist. The mint complements the chocolate and adds a subtle zing. Keep the raspberry jam for the tart contrast.
Almond Flour Edition
Use almond flour for a gluten‑free version. Replace the all‑purpose flour with an equal amount of almond flour, and add an extra egg to help bind the batter. The cupcakes will have a nutty flavor and a slightly denser texture.
Espresso‑Infused Cupcakes
Add 1 tablespoon of instant espresso powder to the dry mix. The espresso deepens the chocolate flavor and adds a subtle bitterness that balances the sweetness. This variation is perfect for coffee lovers.
White Chocolate Raspberry Cupcakes
Replace the dark chocolate chips with white chocolate chips. The creamy white chocolate contrasts with the tart raspberries, creating a luxurious flavor. The glaze can also be made with white chocolate for a cohesive look.
Lemon‑Raspberry Cupcakes
Add 1 tablespoon of lemon zest to the batter for a bright citrus note. The lemon zest pairs wonderfully with the raspberries and adds a fresh, lively flavor. The cupcakes will have a slightly lighter color.
Storing and Bringing It Back to Life
Fridge Storage
Store cupcakes in an airtight container in the refrigerator for up to 5 days. The glaze may soften slightly, so keep a paper towel in the container to absorb excess moisture. When ready to serve, let them sit at room temperature for 15 minutes to restore their softness.
Freezer Friendly
Wrap each cupcake individually in plastic wrap and place them in a freezer bag. Freeze for up to 2 months. To thaw, let them sit in the refrigerator overnight and then bring to room temperature for 30 minutes. The glaze will remain firm, giving a crisp finish.
Best Reheating Method
Reheat cupcakes in a preheated oven at 300°F (150°C) for 5–7 minutes. This gently warms them without drying out. Add a tiny splash of water to the bottom of the pan to create steam, which keeps the cupcakes moist and restores their original texture.