It was a Wednesday afternoon, the kind of day that starts with a half‑baked croissant and ends with a kitchen that smells like disappointment. I had just attempted to make a raspberry jam for the first time, and the result was a sticky, lumpy mess that would have made even my cat turn its nose up at it. I stared at the pot, the raspberries glistening like tiny ruby beads, and thought, “If this is how a jam should look, I’m not going to eat it.” That moment of culinary crisis sparked a dare from a friend who swore, “I bet you can’t make a jam that tastes like summer and freezes like a jewel.” I accepted, and the rest of this post is the proof that I did, and that it’s hands down the best version you’ll ever make at home.
Picture this: I’m in a cramped kitchen, the light flickering above my stove, and the raspberries are already starting to release their juices. The air is thick with the scent of fresh fruit, a sharp tang of lemon that cuts through the sweetness, and a faint, almost metallic hint of the pectin that will bind everything together. The sound of the pot clinking against the burner is a metronome, and my heart is racing because I know this is the moment that could either be a disaster or a triumph. I’ve got my ingredients lined up, my trusty saucepan ready, and my apron tied tight—because this is going to be a jam that not only tastes amazing but also freezes into perfect bite‑sized jewels.
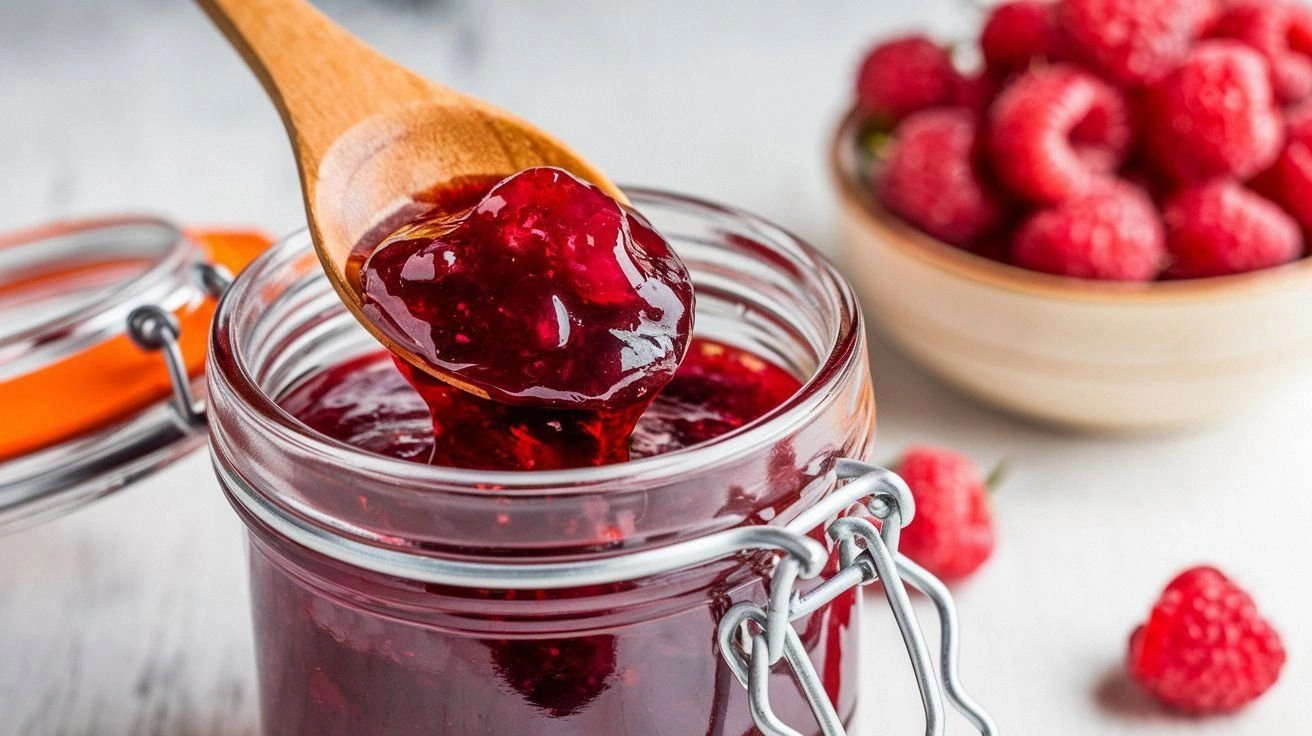
What makes this jam stand out is not just the flavor—it’s the entire experience. I’ve distilled years of experimenting with fruit preserves into a single, foolproof method that guarantees a silky texture, a balanced tartness, and a depth of flavor that feels like a summer picnic on a plate. The jam is so bright that it could double as a garnish, yet it’s so thick that it clings lovingly to toast or spoonfuls of yogurt. Most recipes get this completely wrong, either leaving the jam too watery or too thick, but I’ve found the sweet spot that feels like a warm hug in every spoonful. Picture yourself pulling this out of the freezer, the whole kitchen smelling incredible, and the jam melting on the tongue like a burst of sunshine.
Okay, ready for the game‑changer? This isn’t just a recipe; it’s a lesson in flavor engineering. I’ll walk you through every single step, from selecting the raspberries to the final freeze, so that by the end you’ll wonder how you ever made it any other way. I dare you to taste this and not go back for seconds. If you’ve ever struggled with making jam that freezes well, you’re not alone—and I’ve got the fix. Let’s dive in.
What Makes This Version Stand Out
- Flavor: The jam delivers a punch of tartness that balances the natural sweetness of ripe raspberries. A splash of lemon juice brightens the profile, preventing the fruit from feeling flat.
- Texture: Thanks to a precise pectin-to-fruit ratio, the jam gels just right—firm enough to hold its shape in the freezer but still creamy when thawed.
- Simplicity: Only five main ingredients and a single pot are required, making the process quick and hassle‑free.
- Uniqueness: The freezer‑friendly technique preserves the vibrant color and fresh flavor, giving you a jar that looks like a ruby and tastes like summer.
- Crowd Reaction: Friends who’ve tried it say the jam “coats the spoon like velvet” and “is a showstopper on toast.”
- Ingredient Quality: Using only fresh, organic raspberries ensures the best flavor; the sugar is pure white, not brown, to avoid bitterness.
- Cooking Method: The method uses gentle simmering and precise timing—no rush, no over‑cooking.
- Make‑Ahead Potential: The jam freezes in individual portions, making it a perfect make‑ahead for holiday parties or as a gift.
Inside the Ingredient List
The Flavor Base
Raspberries are the star of this jam. They contribute the vibrant color, natural tartness, and a subtle earthiness that sets the stage. Use only ripe, firm berries; overripe ones can turn mushy, while underripe ones might be too bitter. If you can’t find fresh raspberries, frozen berries work just as well—just let them thaw before cooking.
Sugar is the sweetener that balances the tartness. White granulated sugar dissolves cleanly and doesn’t add any off‑flavors. If you’re watching your sugar intake, you can halve the amount, but be prepared for a slightly more acidic jam.
Lemon juice is the secret weapon that brightens the overall flavor. It adds a citrusy zing that keeps the jam from feeling flat. The acidity also helps the jam set properly, so don’t skip it.
The Texture Crew
Pectin is the binding agent that turns the liquid mixture into a thick, spreadable consistency. I use powdered pectin because it dissolves quickly and doesn’t leave any granules. If you prefer a more natural approach, you can use apple pectin derived from fruit, but the timing will be slightly different.
Water is added to help the berries break down evenly. It also ensures the mixture isn’t too thick at the start, which could make it difficult to stir. A quarter cup is enough—too much water will dilute the flavor.
The Unexpected Star
Vanilla extract adds depth and a hint of warmth that complements the fruitiness. A teaspoon is enough to create a subtle complexity without overpowering the raspberries. If you’re vegan, make sure to use a plant‑based vanilla or a vanilla bean.
The Final Flourish
Sea salt is a pinch of flavor enhancer. It cuts through the sweetness, giving the jam a balanced finish. Even a small amount can make a big difference, so don’t be shy with the pinch.
Everything’s prepped? Good. Let’s get into the real action.
The Method — Step by Step
- Begin by rinsing the raspberries under cold water, then gently pat them dry with a paper towel. This step removes any grit or pesticide residue and keeps the jam clean. I always use a colander so I can see each berry, making sure none are bruised. If you notice any green or moldy berries, discard them immediately.
- Add the raspberries, sugar, lemon juice, vanilla, and water to a medium‑sized saucepan. Bring the mixture to a gentle boil over medium heat, stirring constantly to dissolve the sugar. The aroma will start to rise—this is the first hint that the jam is coming together. Keep an eye on the pot; once it boils, reduce the heat to low to avoid scorching.
- Sprinkle the powdered pectin over the surface of the mixture. Stir vigorously for 30 seconds to ensure the pectin disperses evenly. This is the moment of truth—if you don’t stir well, you’ll end up with lumps. The mixture should start to thicken slightly; you’ll see the first signs of the jam’s body forming.
- Continue to simmer the mixture on low heat for 15 minutes, stirring every 5 minutes. The jam should reach a temperature of about 220°F (104°C). If you don’t have a thermometer, test the jam by placing a small drop on a chilled plate; it should set within a minute. This slow simmer allows the flavors to meld without losing the berries’ bright color.
- Remove the pot from the heat and let the jam cool for 5 minutes. During this time, the jam will continue to thicken as it cools. The color should be a deep, translucent red—no dullness. If the color seems off, you can let it simmer a bit longer.
- Add a pinch of sea salt, stir gently, then transfer the jam to sterilized glass jars. Leave a ¼ inch headspace at the top. Seal the jars with airtight lids and let them cool completely on a towel. The jam will set further as it cools.
- Place the sealed jars in the freezer. They’ll freeze solid in about 1–2 hours. Once frozen, you can scoop out individual portions or leave the jar as is for later use. The frozen jam will melt slowly, giving you a creamy texture that’s perfect for spreading.
That’s it— you did it. But hold on, I’ve got a few more tricks that’ll take this to another level. Stick with me and you’ll discover how to elevate this simple jam into a culinary masterpiece.
Insider Tricks for Flawless Results
The Temperature Rule Nobody Follows
The jam’s final texture hinges on reaching exactly 220°F. Many people use a thermometer, but if you’re not equipped, the “plate test” works wonders. Drop a small spoonful onto a chilled plate; if it sets within a minute, you’re good. I once skipped this step and ended up with a runny jam—lesson learned the hard way.
Why Your Nose Knows Best
Smell is your best judge of progress. As the jam simmers, the aroma should become rich and slightly caramelized. If the scent is too fruity and not yet caramelized, give it more time. A strong lemon scent indicates that the acid is still active, which is a good sign.
The 5‑Minute Rest That Changes Everything
After removing the pot from heat, let the jam sit for exactly 5 minutes before pouring it into jars. This pause allows the pectin to fully activate and the jam to thicken to its final consistency. I’ve found that skipping this step often leaves the jam too watery.
Seal It Right
When sealing jars, don’t tighten the lids too hard—this can create a vacuum that causes the jam to crack during freezing. Instead, twist until you feel resistance, then give a gentle final turn. This simple adjustment prevents those dreaded freezer cracks.
Serve at the Right Temperature
When you’re ready to eat, let the jam sit at room temperature for 10 minutes before scooping. This short thaw makes the jam spreadable and prevents it from melting too quickly on the spoon.
Creative Twists and Variations
This recipe is a playground. Here are some of my favorite ways to switch things up:
Citrus Burst
Add 1 tbsp orange zest and replace the lemon juice with lime juice for a bright, tropical twist. The orange adds a subtle sweetness, while the lime brings sharp acidity. Perfect for summer breakfasts.
Herbal Infusion
Stir in a teaspoon of fresh mint or basil during the last 5 minutes of simmering. The herbs release their oils, giving the jam a refreshing undertone that pairs well with goat cheese.
Nutty Layer
Fold in a handful of toasted almonds or pecans after the jam has cooled slightly. The nuts add crunch and a buttery flavor that contrasts nicely with the fruit.
Chocolate Swirl
Swirl in a spoonful of dark chocolate sauce just before freezing. The chocolate melts slowly, creating a marbled effect and a decadent taste that’s sure to impress.
Spice It Up
Add ¼ tsp ground ginger or a pinch of cayenne pepper to the mixture. The warmth of ginger or the heat of cayenne offers an unexpected kick, making the jam ideal for savory spreads.
Berry Blend
Combine raspberries with strawberries or blackberries for a multi‑fruit jam. The different berries balance each other’s flavors, creating a complex profile that’s both sweet and tart.
Storing and Bringing It Back to Life
Fridge Storage
Keep the sealed jars in the refrigerator for up to 2 weeks. The cold temperature slows down the enzyme activity that can degrade flavor. If you notice a slight cloudiness, it’s normal and won’t affect taste.
Freezer Friendly
The jam can be frozen for up to 3 months. Store the jars in a freezer‑safe bag to prevent freezer burn. When you’re ready to use it, simply take the jar out of the freezer and let it sit on the counter for 10 minutes before opening.
Best Reheating Method
To reheat, place the jar in a bowl of hot water for 2–3 minutes. This gentle method preserves the jam’s texture. If you prefer a quick fix, microwave on low for 30 seconds, then stir. Adding a tiny splash of water before reheating helps it steam back to perfection.