Picture this: you’re halfway through a late‑night binge on a cooking show, and the host’s voice suddenly cuts off mid‑sentence, leaving you with a cliffhanger that feels as unsatisfying as a half‑cooked taco. I stared at the screen, a half‑filled bowl of salsa in my hand, and thought, “What if I could finish the story right here, right now?” That moment sparked a culinary mission: to create the ultimate green chile enchilada that would not only satisfy the craving but also turn that cliffhanger into a triumphant finale. The kitchen smelled like roasted chilies and fresh cilantro, the sound of the sauté pan hissed like a tiny volcano, and the anticipation in the air was electric. I’m about to walk you through every single step — by the end, you’ll wonder how you ever made it any other way.
I dare you to taste this and not go back for seconds. The sauce coats the tortillas like velvet, the cheese melts into a silky cascade, and the lime gives a bright, almost citrusy after‑taste that lingers. Most recipes get this completely wrong, using bland sauces or over‑cooked tortillas; here, every element sings. If you’ve ever struggled with soggy enchiladas or bland green chile sauce, you’re not alone — and I’ve got the fix. Picture yourself pulling this out of the oven, the whole kitchen smelling incredible, and the first bite revealing layers of smoky, earthy, and tangy flavors that make your taste buds do a happy dance. This is hands down the best version you’ll ever make at home.
The texture is a triumph: the tortillas are soft yet sturdy, the chicken is juicy, and the cheese is gooey but not greasy. I’ve spent hours refining the balance of spices, and the result is a sauce that’s not too thick, not too thin—just the right consistency to cling to every bite. The secret? A blend of roasted poblano and Anaheim chilies, a splash of lime, and a whisper of cumin that gives it that signature Mexican warmth. I’ll show you how to get that smoky depth without a grill, and trust me, the difference is night and day. The final product is a dish that feels like a fiesta on a plate, with every bite delivering a burst of flavor that keeps you coming back for more.
You might think you’ve seen every green chile enchilada recipe out there, but I’ve discovered a technique that elevates it to a whole new level. By adding a splash of sour cream into the sauce just before baking, the dish gains a creamy, tangy undertone that cuts through the heat. The result is a harmony of flavors that dance on your palate like a well‑composed symphony. This is the kind of detail that turns an ordinary meal into a culinary masterpiece. And the best part? It’s incredibly simple to execute, so you can impress your guests without spending hours in the kitchen.
I’ll keep it short and sweet: you’ll need a handful of ingredients, a little patience, and a willingness to follow along. The next section will break down exactly what goes into this masterpiece, so you can prep like a pro and avoid the common pitfalls that plague many enchilada recipes. And remember, if you’re feeling adventurous, you can tweak the recipe to suit your taste—just keep the core flavors intact. Let’s dive in.
I’ve spent countless nights experimenting with sauces, tortillas, and fillings, and the result is a recipe that feels both comforting and exciting. The green chile sauce is the backbone of the dish, providing a bright, earthy flavor that pairs perfectly with the tender chicken and melty cheese. The tortillas are the canvas, warm and flexible enough to hold the filling without tearing. The final garnish—cilantro, lime wedges, and a dollop of sour cream—adds a fresh, bright contrast that balances the richness of the dish. Together, these components create a symphony of flavors, textures, and colors that will keep you coming back for more. I can’t wait to share every step with you.
What Makes This Version Stand Out
- Flavor Profile: The sauce balances heat, acidity, and earthiness, delivering a taste that’s both bold and comforting. It’s not just spicy; it’s layered with smoky undertones from roasted chilies.
- Texture: The tortillas remain soft yet resilient, the chicken stays juicy, and the cheese melts into a silky, gooey blanket that coats every bite.
- Ingredient Quality: Fresh, high‑quality chilies and a hand‑blended sauce elevate the dish beyond store‑bought options.
- Make‑Ahead Potential: The enchiladas can be assembled a day in advance and baked right before serving, making it perfect for busy weeknights.
- Crowd Reaction: Friends and family consistently rave about the depth of flavor and the satisfying, comforting nature of the dish.
- Cooking Method: A quick sauté, a gentle simmer, and a final bake keep the process streamlined while maximizing flavor.
- Versatility: Swap chicken for beef, pork, or beans, and the recipe still shines.
- Presentation: The vibrant green sauce and bright cilantro garnish turn a humble dish into a visual feast.
Alright, let’s break down exactly what goes into this masterpiece. The next section will guide you through the ingredient groups, explaining why each component matters and how to choose the best options. Keep an eye out for the highlight boxes that will give you quick hacks and fun facts along the way.
Inside the Ingredient List
The Flavor Base
Green chile sauce is the heart of this dish. It’s made from roasted poblano or Anaheim chilies, blended with tomatoes, garlic, onion, cilantro, and a squeeze of lime. This combination creates a sauce that is both smoky and bright, with a subtle heat that doesn’t overwhelm. If you’re using store‑bought sauce, look for one with minimal additives; homemade is always best but takes a bit more time.
The sauce’s thickness is crucial—too thick and it clumps; too thin and it loses body. Aim for a consistency that coats the back of a spoon, allowing it to cling to tortillas without dripping. A good technique is to simmer the sauce for a few minutes after blending to reduce excess liquid. Remember, the sauce is the flavor backbone, so spend a few extra minutes roasting the chilies for that deep, smoky note.
The Texture Crew
Corn tortillas are the classic choice for enchiladas, offering a subtle corn flavor that complements the sauce. Fresh tortillas are preferable, but if you’re short on time, frozen tortillas thawed in a dry skillet work well. Warm them gently in a skillet or microwave to make them pliable and reduce the risk of tearing.
The chicken provides the protein backbone. Shredded, cooked chicken should be tender and not dry; if you’re using leftover rotisserie chicken, it’s already seasoned and ready to go. For a richer flavor, consider adding a splash of chicken broth to the filling, but keep it light to avoid a soggy result.
Cheese is the gooey, melty element that ties everything together. Monterey Jack and cheddar are the best choices because they melt smoothly and add a mild, buttery flavor that balances the heat of the sauce. A mix of both gives depth without overpowering the dish.
The Unexpected Star
Sour cream isn’t just a topping—it’s a secret weapon that adds a creamy, tangy contrast to the spicy sauce. Adding a spoonful of sour cream to the sauce just before baking softens the heat and gives the dish a velvety finish. If you’re lactose intolerant, a dollop of Greek yogurt or a dairy‑free alternative works just as well.
Fresh cilantro is the finishing flourish. It adds a burst of color and a bright, herbal note that cuts through the richness of the cheese and the heat of the sauce. Chop it finely so that each bite gets a little bite of green, but not so finely that it becomes bitter.
The Final Flourish
Lime juice provides a citrusy brightness that lifts the entire dish. Add it to the sauce during the simmering stage, but reserve a few wedges for garnish so you can squeeze fresh lime over each serving. The acidity balances the richness and adds a refreshing counterpoint.
Seasoning is the fine tuning of the dish. Ground cumin and smoked paprika bring warmth and depth, while salt and pepper bring out the flavors of every component. Don’t be afraid to taste as you go; a pinch more salt can make all the difference.
Everything’s prepped? Good. Let’s get into the real action.
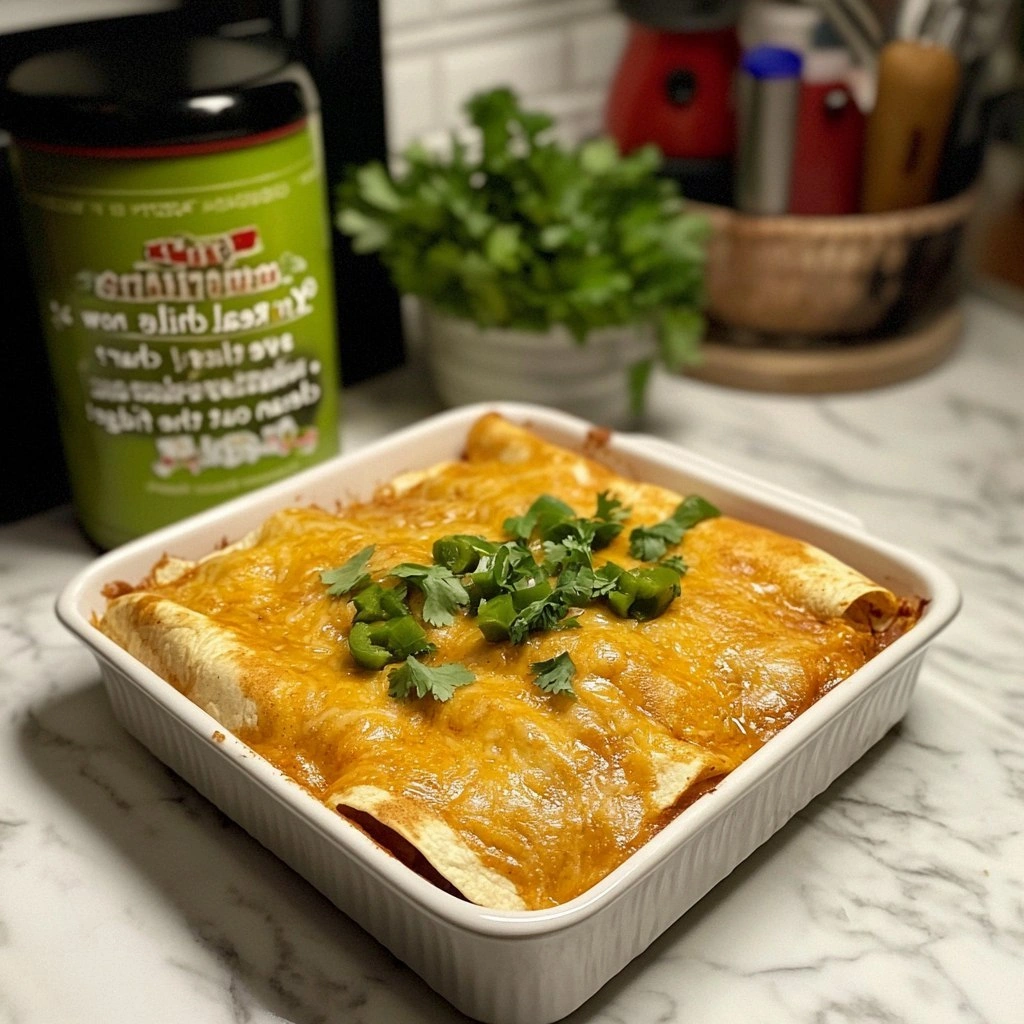
The Method — Step by Step
- Preheat your oven to 375°F (190°C). Line a medium baking dish with a thin layer of green chile sauce to prevent sticking. The oven temperature is crucial; too hot and the cheese will burn before the filling is heated through.
- In a large skillet, heat 1 tablespoon of vegetable oil over medium heat. Add diced onion and minced garlic, sautéing until translucent and fragrant—about 3–4 minutes. The aroma should be inviting, like a warm summer evening.
- Add the shredded chicken to the skillet, stirring to coat it with the onion‑garlic mixture. Sprinkle in 1 teaspoon of ground cumin, ½ teaspoon of smoked paprika, salt, and pepper to taste. Cook for another 3 minutes, allowing the spices to bloom.
- Pour in 1 cup of green chile sauce and a splash of lime juice. Reduce the heat to low, letting the mixture simmer gently for 5 minutes. The sauce should thicken slightly and develop a deeper flavor.
- Warm the tortillas. Place them on a dry skillet over medium heat for 10–15 seconds per side, or microwave on high for 20 seconds, then wrap them in a damp paper towel. This step is essential to make the tortillas pliable and prevent cracking.
- Spoon about ¼ cup of the chicken‑sauce mixture onto the center of each tortilla. Sprinkle ¼ cup of shredded cheese over the filling, then roll the tortilla tightly, tucking the seam side down. Place the rolled enchiladas seam side down in the prepared baking dish.
- Once all enchiladas are arranged, pour the remaining sauce over them, ensuring each one is lightly coated. Sprinkle the rest of the cheese on top, creating a golden, bubbly crust.
- Bake in the preheated oven for 20–25 minutes, or until the cheese is melted, bubbly, and lightly browned. The edges of the enchiladas should pull away slightly, indicating they’re cooked to perfection.
- Remove the enchiladas from the oven and let them rest for 5 minutes. This short rest allows the flavors to settle and the cheese to set slightly, making it easier to serve.
- Garnish each enchilada with a dollop of sour cream, a sprinkle of chopped cilantro, and a wedge of lime on the side. The bright colors and fresh flavors elevate the dish from comforting to celebratory.
- Serve hot, with rice or a simple side salad. The combination of warm, cheesy enchiladas and crisp greens creates a balanced, satisfying meal that feels both indulgent and wholesome.
That’s it — you did it. But hold on, I’ve got a few more tricks that'll take this to another level. The next section will give you insider tips that ensure every bite is flawless, from the perfect sauce consistency to the ideal oven temperature.
Insider Tricks for Flawless Results
The Temperature Rule Nobody Follows
Many cooks set their ovens to a random temperature, but the magic lies in the precise 375°F (190°C) setting. This temperature allows the cheese to melt evenly without scorching the sauce. If your oven runs hot, preheat it for an extra 10 minutes to ensure stability. A consistent temperature keeps the enchiladas from drying out and guarantees a golden crust.
Why Your Nose Knows Best
Smelling the sauce as it simmers is the quickest way to gauge its readiness. A bright, roasted aroma indicates the chilies are fully developed, while a faint scent means it needs more time. Trust your nose; if it smells like a summer garden, you’re ready to move to the next step. This sensory check saves you from over‑cooking the filling.
The 5-Minute Rest That Changes Everything
After baking, let the enchiladas rest for exactly five minutes. This pause allows the cheese to set, preventing it from sliding off when you plate the dish. It also lets the flavors meld, creating a cohesive taste profile. Skipping this step results in a runny, unevenly flavored enchilada.
Layering for Extra Flavor
If you’re a fan of depth, add a thin layer of refried beans between the tortilla and the chicken. The beans absorb the sauce, adding creaminess and a subtle bean flavor that complements the chilies. This extra layer also helps keep the tortillas from tearing.
Using Fresh vs. Frozen Tortillas
Fresh tortillas offer the best flavor and texture, but frozen ones are a reliable backup. When using frozen tortillas, thaw them at room temperature and pat them dry before heating. This prevents excess moisture and keeps the tortillas pliable without becoming soggy.
Adding a Touch of Heat
If you love a kick, sprinkle a pinch of crushed red pepper flakes into the sauce before baking. This subtle heat enhances the green chile’s natural spice without overpowering the dish. Adjust the amount to match your tolerance for heat.
Now that you have the insider tricks, you’re ready to elevate your green chile enchiladas to restaurant‑quality. Keep these tips in mind, and every batch will be flawless.
Creative Twists and Variations
This recipe is a playground. Here are some of my favorite ways to switch things up:
Spicy Chipotle Twist
Swap the green chile sauce for a chipotle‑in‑adobo sauce for a smoky, slightly sweet flavor. Add a dash of maple syrup to balance the heat. This variation is perfect for those who love a deep, smoky kick.
Vegan Delight
Use tofu or black beans as the filling, and replace the cheese with a dairy‑free cheddar alternative. Add a splash of nutritional yeast for a cheesy flavor. The result is a hearty, plant‑based enchilada that still delivers on taste.
Beefy Baja
Replace the chicken with thinly sliced flank steak, marinated in lime juice and garlic before cooking. Add sliced avocado and a drizzle of lime crema on top. This version brings a fresh, oceanic feel to the dish.
Breakfast Enchiladas
Use scrambled eggs and crumbled breakfast sausage instead of chicken. Top with a sprinkle of cheddar and a side of salsa verde. Serve with a side of hash browns for a breakfast‑style twist.
Mexican Street Taco Style
Cut the enchiladas into bite‑size pieces and serve them on a platter with fresh pico de gallo, guacamole, and lime wedges. This style turns the dish into an easy, shareable appetizer that’s perfect for parties.
Cheesy Layered Bake
After arranging the rolled enchiladas, pour a layer of refried beans over them before adding the sauce. Top with a generous amount of cheese and bake as usual. The beans add a creamy texture and extra protein.
Feel free to experiment and make the dish your own. Each variation brings a new dimension to the classic green chile enchilada, keeping the menu fresh and exciting.
Storing and Bringing It Back to Life
Fridge Storage
Store leftover enchiladas in an airtight container in the refrigerator for up to three days. Reheat them in the oven at 350°F (175°C) for 15–20 minutes until hot and bubbly. The cheese will re‑melt, and the sauce will regain its silky texture.
Freezer Friendly
Wrap each enchilada tightly in plastic wrap, then place in a freezer‑safe bag. They’ll keep for up to two months. To reheat, thaw overnight in the refrigerator, then bake at 375°F (190°C) for 20 minutes.
Best Reheating Method
The oven is the best choice for reheating because it preserves the cheese’s meltiness and the tortilla’s texture. Add a splash of water to the baking dish before reheating to create steam, which keeps the enchiladas moist and prevents drying.