I was standing in my kitchen on a rainy St. Patrick’s Day, staring at a half‑empty bag of Double Stuffed Oreos and a pot of green‑white melting chocolate that looked like it had been rescued from a leprechaun’s pot of gold. The clock was ticking, the Irish jig on the radio was getting louder, and my roommate dared me to create something that would make even the most skeptical cousin say, “Okay, that’s actually good.” I tried a quick dunk in plain chocolate, but it turned out as bland as a rain‑soaked sidewalk, and the whole thing fell apart like a soggy paper towel. That disaster sparked a fire under me, and I vowed to perfect the ultimate festive Oreo that would be the talk of every office potluck, every family gathering, and every Instagram feed this March.
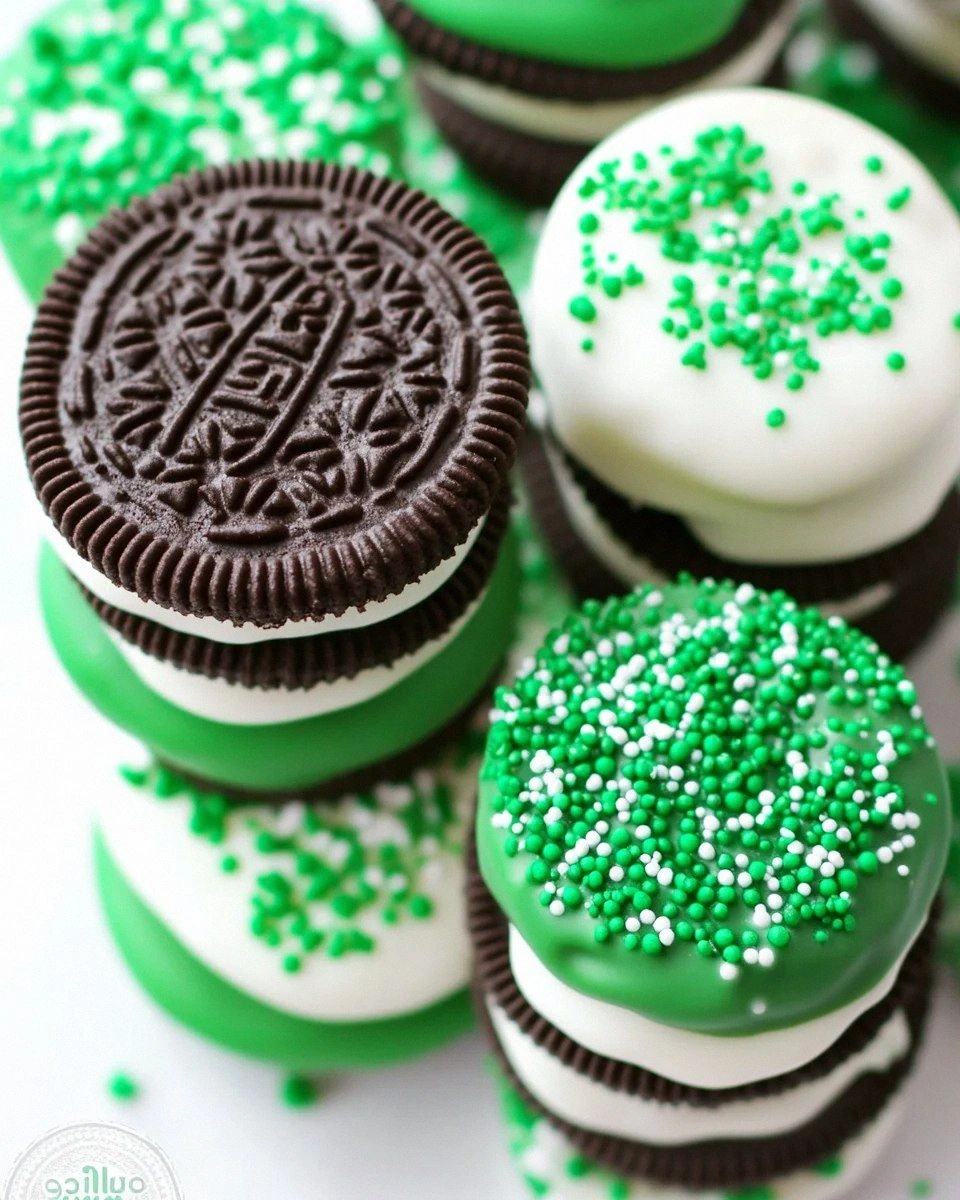
Picture this: a glossy, emerald‑green coating that snaps with a satisfying crack when you bite, revealing the creamy, double‑stuffed center that’s still soft enough to melt on your tongue. The faint scent of cocoa mingles with a whisper of vanilla, while a sprinkle of glittering white sugar crystals adds a sparkle that would make any parade float jealous. The texture is a glorious contrast—crunchy cookie edges, velvety chocolate, and a creamy core that feels like a sweet secret whispered straight to your taste buds. As you pull one out of the tray, the chocolate glistens like a freshly polished shamrock, and the whole kitchen smells like a chocolate‑covered dream that’s been kissed by the luck of the Irish.
Most recipes for chocolate‑dipped Oreos either drown the cookie in a sea of chocolate or skip the festive color altogether, leaving you with a bland, brown‑only snack that could belong to any holiday. This version stands out because it balances the rich, buttery chocolate with a pop of vibrant green, and the double‑stuffed filling stays perfectly intact—no soggy mess, no chocolate‑filled cracks. The secret? A precise tempering method that gives the chocolate a glossy finish and a snap that’s louder than a bagpipe solo, plus a quick chill that sets the coating without sacrificing that melt‑in‑your‑mouth feel.
I’m about to walk you through every single step—from selecting the right Oreos to achieving that perfect chocolate sheen—so by the end, you’ll wonder how you ever settled for anything less. I dare you to taste this and not go back for seconds; the combination is hands down the best version you’ll ever make at home. Ready? Let’s dive in and make some magic happen.
What Makes This Version Stand Out
- Taste: The dual‑layer chocolate—green on the outside, white on the inside—creates a flavor duet that’s sweet, buttery, and just a touch nostalgic, echoing the classic Oreo cream while adding a festive twist.
- Texture: A crisp chocolate shell that cracks like fresh ice, contrasted with the soft, double‑stuffed cookie interior that melts like butter on a warm toast.
- Simplicity: Only three ingredients are needed, yet the technique elevates them to a professional‑grade treat without any fancy equipment.
- Uniqueness: The green‑white swirl isn’t just for looks; it’s a visual cue that tells your guests “St. Patrick’s Day is here, and it’s delicious.”
- Crowd Reaction: People will line up for seconds, and you’ll hear the inevitable “What’s the secret?” before the first bite is even taken.
- Ingredient Quality: Using Double Stuffed Oreos guarantees a richer, creamier center, while premium melting chocolate ensures a glossy finish and a clean snap.
- Method: Tempering the chocolate and a quick chill lock in flavor and texture, preventing the dreaded “sweat” that ruins most dipped treats.
- Make‑Ahead Potential: Store them in an airtight container and they stay fresh for up to a week, making them perfect for party prep.
Inside the Ingredient List
The Flavor Base
Double Stuffed Oreos are the heart of this treat. Their thick, vanilla‑infused cream adds a buttery richness that pairs perfectly with chocolate, creating a flavor bridge that feels both familiar and festive. If you skip the double‑stuffed variety, you’ll lose that extra creaminess, and the chocolate will dominate, making the bite feel one‑dimensional. You can substitute regular Oreos, but expect a thinner cream layer and a slightly less indulgent experience.
The Texture Crew
The green & white melting chocolate does the heavy lifting for both flavor and texture. Its cocoa butter content ensures a glossy finish and a crisp snap once set, while the green tint adds that St. Patrick’s Day sparkle. If you opt for a lower‑quality chocolate, you’ll end up with a dull coating that melts too quickly in your hand, ruining the crunch factor. Look for a chocolate labeled “baking” or “tempering” for the best results.
The Unexpected Star
Sprinkles are more than just decoration; they add a subtle crunch and a burst of sweet crunch that contrasts the smooth chocolate. Choose white non‑pareve sprinkles for a clean look, or go bold with rainbow confetti for a party vibe. If you’re allergic to certain colors, you can substitute with crushed pistachios or toasted coconut flakes for a different texture.
The Final Flourish
A pinch of sea salt is optional but highly recommended; it amplifies the chocolate’s depth and balances the sweetness of the cream filling. If you’re watching sodium, a tiny pinch will still give you that flavor boost without noticeable saltiness. Finally, a splash of vanilla extract in the melted chocolate can add an extra layer of aroma that makes the whole batch smell like a bakery on St. Patrick’s Day.
Everything's prepped? Good. Let's get into the real action...
The Method — Step by Step
Gather all your ingredients and equipment: a heat‑proof bowl, a saucepan for the double boiler, a silicone spatula, a parchment‑lined baking sheet, and a sturdy whisk. I like to line the sheet with parchment because it prevents sticking and makes cleanup a breeze. Before you even start melting chocolate, give the Oreos a quick dry‑run—place them on a plate and make sure none are cracked; a broken cookie will become a chocolate‑covered crumb later.
Kitchen Hack: Place the Oreos in the freezer for 10 minutes before dipping; the cold cookie contracts slightly, creating a tighter seal with the chocolate.Set up a double boiler: fill a saucepan with a few inches of water, bring it to a gentle simmer, then place your heat‑proof bowl on top, ensuring the bottom doesn’t touch the water. Add the green & white melting chocolate to the bowl, stirring constantly with a silicone spatula. The chocolate should melt slowly; you’ll hear a soft sigh as the cocoa butter releases, and the mixture will turn silky and glossy.
Once fully melted, remove the bowl from heat and let it sit for about 30 seconds. This is the moment of truth: you’ll see the chocolate start to thicken just enough to coat the back of a spoon without dripping off instantly. If it’s too thick, add a splash of vegetable oil (about a teaspoon) and stir; if it’s too thin, let it cool a few more seconds. This temperature control is the secret that gives you that snap when you bite.
Prepare your dipping station: line a shallow dish with parchment, and have a second dish ready for sprinkles. Using a fork or a dedicated dipping tool, submerge each Oreo halfway into the chocolate, letting any excess drip back into the bowl. Twist gently to achieve an even coat; the chocolate should cling like a glossy veil, not pool around the cookie.
Immediately after dipping, roll the chocolate‑covered side in sprinkles, pressing lightly so they adhere. This step is quick—if the chocolate begins to set before you sprinkle, it will lose its ability to hold the decorations, resulting in a patchy look.
Watch Out: If your kitchen is warm, the chocolate may set too fast; keep the bowl over warm water for a minute or two to maintain fluidity.Place the coated Oreos onto the parchment‑lined sheet, spacing them a half‑inch apart. This prevents them from sticking together as they set. While you work, you’ll notice a faint, buttery aroma rising—this is the chocolate reaching its perfect temper.
Transfer the baking sheet to the refrigerator for exactly 15 minutes. The chill forces the chocolate to contract, creating that satisfying snap. Do not leave them longer than 30 minutes, or the chocolate will become too hard and lose its glossy sheen.
While the Oreos are chilling, you can prep a serving platter. I love arranging them in a circular pattern that mimics a Celtic knot, because presentation matters as much as flavor. Sprinkle a few extra sprinkles around the platter for a festive confetti effect.
After the chilling period, remove the tray and let the Oreos sit at room temperature for 5 minutes before serving. This short rest allows the chocolate to soften just enough for a perfect bite—too cold and it feels like biting into a frozen bar, too warm and it will melt in your hand.
And now the fun part: dig in. I’ll be honest — I ate half the batch before anyone else got to try it, and the rest of the party was left with wide‑eyed admiration. This next part? Pure magic. Serve with a cold glass of milk or a stout for an indulgent contrast, and watch the compliments roll in.
That's it — you did it. But hold on, I've got a few more tricks that'll take this to another level...
Insider Tricks for Flawless Results
The Temperature Rule Nobody Follows
Chocolate is fickle; it loves a precise temperature window. Keep your melted chocolate between 88°F and 92°F for the green chocolate, and 84°F to 88°F for the white. Use an instant‑read thermometer; a few degrees off and you’ll get a dull, matte finish instead of that coveted high‑gloss. I once tried to guess the temperature and ended up with a chocolate that felt like chewing on a rubber band.
Why Your Nose Knows Best
When the chocolate is properly tempered, you’ll notice a faint, nutty aroma that signals it’s ready. If the scent smells burnt or overly sweet, you’ve over‑heated it. Trust that nose cue more than the clock; it’s a reliable, sensory shortcut that saves you from a ruined batch.
The 5‑Minute Rest That Changes Everything
After chilling, give the dipped Oreos a brief 5‑minute rest at room temperature before serving. This tiny window lets the chocolate relax, preventing the dreaded “crack” that can happen if you bite straight from the fridge. A friend tried skipping this step once — let’s just say the crunch was more “ice‑cream‑cone‑break” than “satisfying snap.”
Freezer‑Proofing for Party Prep
If you need to make a large batch ahead of time, freeze the dipped Oreos in a single layer on a tray, then transfer them to a zip‑top bag. When you’re ready to serve, let them thaw for 10 minutes; the chocolate will regain its shine without losing the sprinkle coating.
The Secret Sprinkle Seal
Before you roll the chocolate in sprinkles, lightly dust the chocolate surface with a pinch of powdered sugar. This creates a tacky layer that makes the sprinkles cling better, preventing them from falling off during transport. I discovered this trick after a disastrous party where half the sprinkles ended up on the floor.
Creative Twists and Variations
This recipe is a playground. Here are some of my favorite ways to switch things up:
Mint Madness
Swap the green chocolate for a mint‑infused dark chocolate, and use dark chocolate sprinkles for a sophisticated contrast. The mint flavor pairs beautifully with the creamy Oreo, turning the treat into a holiday‑themed after‑dinner mint.
White‑Chocolate Wonder
Use only white chocolate for a pastel‑green hue (add a few drops of food‑grade green coloring). Top with toasted coconut flakes instead of sprinkles for a tropical twist that still feels festive.
Chocolate‑Covered Oreo Truffles
Crush the dipped Oreos into fine crumbs, mix with a spoonful of cream cheese, roll into balls, and dip again in chocolate. The result is a bite‑size truffle that looks like a miniature leprechaun treasure.
Spicy Irish
Add a pinch of ground ginger or a dash of Irish whiskey to the melted chocolate. The subtle heat and warmth add depth, making the treat perfect for adult gatherings.
Nutty Crunch
Replace sprinkles with finely chopped pistachios or toasted almonds. The nutty flavor complements the chocolate and adds an extra layer of texture that’s surprisingly satisfying.
Storing and Bringing It Back to Life
Fridge Storage
Place the dipped Oreos in an airtight container with a single layer of parchment between layers. They’ll stay fresh for up to 5 days, retaining their snap and sparkle. Avoid stacking too many on top of each other, or the bottom ones may lose their coating.
Freezer Friendly
For longer storage, freeze the Oreos on a tray, then transfer to a zip‑lock bag. They’ll keep for up to 2 months. When you’re ready to serve, let them thaw at room temperature for 10 minutes and add a tiny splash of water to the chocolate surface; the steam will bring back that glossy finish.
Best Reheating Method
If the chocolate has dulled after storage, gently warm the container in a low oven (250°F) for 3‑4 minutes, or place the Oreos on a warm plate for a minute. The heat revives the snap without melting the interior, delivering that fresh‑out‑of‑the‑fridge experience every time.